How to control parameters by velocity
It is a merit to move the parameter by velocity, but for example, you can increase the mix value of the reverb when the velocity is high.
It is like this.
At first, there is no setting, and then the velocity is used to run the Decay of the reverb (Little Plate).
Besides, Gain is also running at velocity.
The first half feels flat, but I think the second half is sharp.
The MIDI notes in the second half look like this. (The first half is completely uniform)
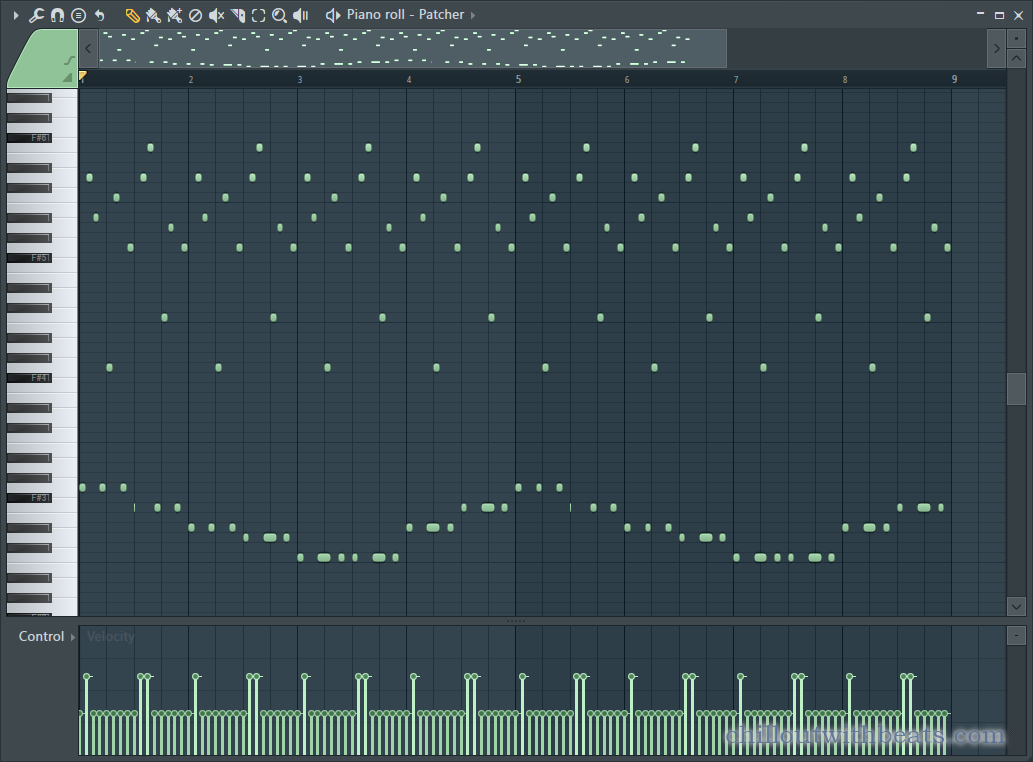
I think it's the right person in the right place rather than which one is better or worse.
If you sidechain, I think the first one will be more effective.
I think it's important to have the drawers you need for the process you need for the sound you want to make.
Then I will explain it immediately.
Control parameters with velocity
First of all, it is a necessary plug-in, but it uses "Patcher" and "Fruity Envelope Controller".
Load "Fruity Envelope Controller" while loading "Patcher" as a sound source.
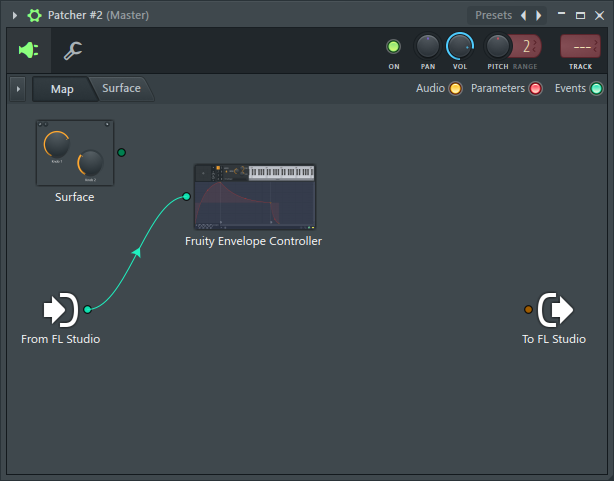
Add sound source
Load the sound source.
I personally like the sound source hereHiveI'm usingAnything is fine.
Just choose a preset that doesn't respond to velocity when choosing a preset.
If you don't know how to set the velocity, "Seurm" and "Vital" have written an article on how to set the velocity.
Please refer to here.
Add effects
The effect uses "Little Plate" here.
For some reason, I searched for "Little Plate" on the condition that noise does not appear when moving the parameters.
At first, when I moved the "Size" parameter of the reverb with velocity, noise appeared as shown below, so I set it to "Decay" of "Little Plate".
The following Reverbs are freeCymatics Space Lite.
Surprisingly, there are few plug-ins that do not get noise when changing the size of Reverb or Decay.
Connection
If you read all of them, it will look like the following.
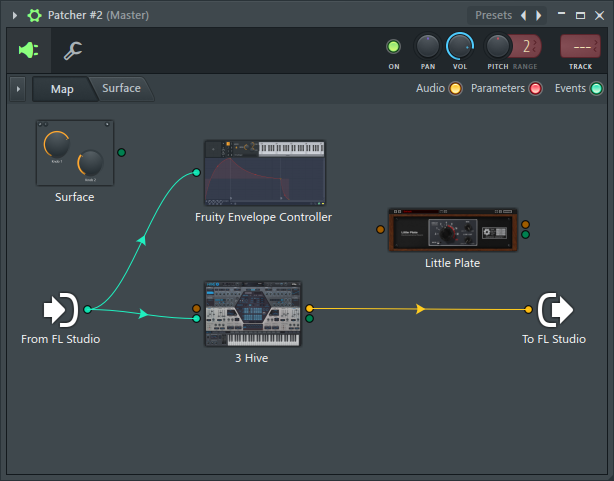
"Fruity Envelope Controller" settings
First, set from "Fruity Envelope Controller".
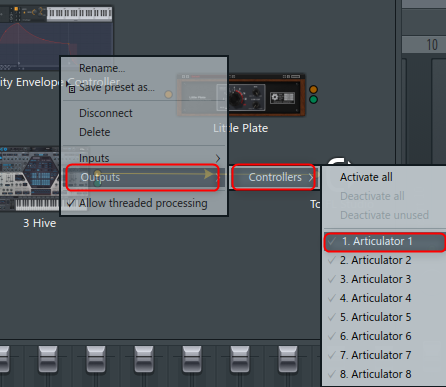
Since you need to prepare the output of the control, right-click and click "Outputs"-> "Controllers"-> "1.Articulator 1".
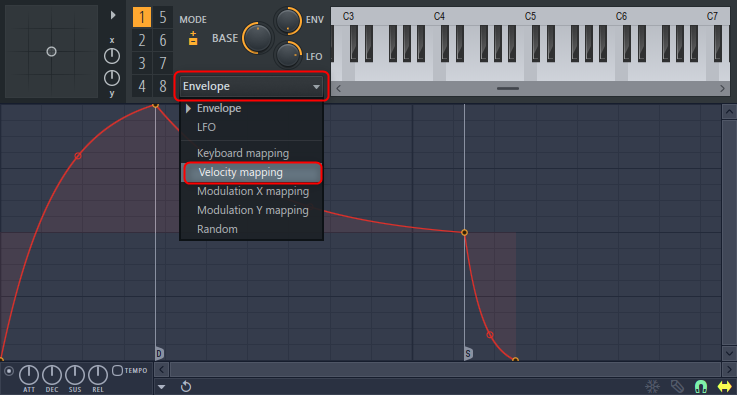
Open the drop-down list with "Envelope" and click "Velocity mapping".
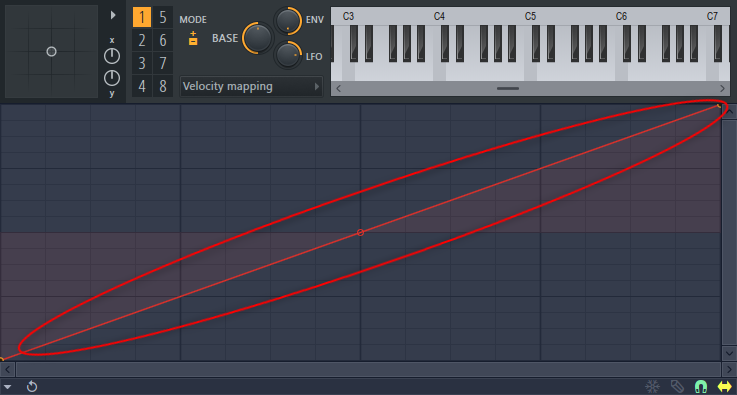
Make the line diagonal.
Effect (Little Plate) settings
Effect settings.
Right-click on the effect and click Inputs-> Parameters-> 3. Decay.
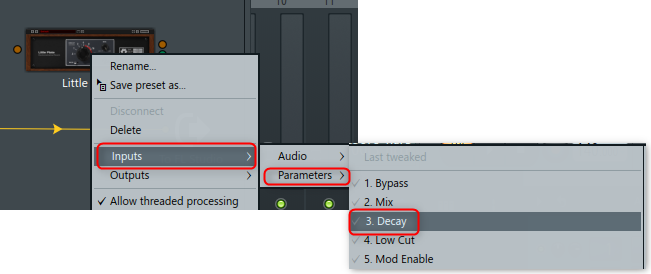
Now you have an input to move the "Decay" parameter.
Then connect as follows.
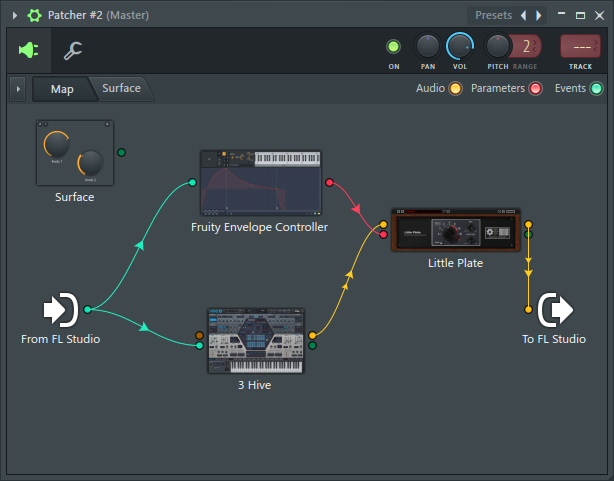
After that, try playing with different velocities of MIDI notes.
When it is strong, the reverb is applied strongly, and when it is weak, the reverb is applied weakly.
I also prepared a video for the time being.
The difference between the sound and the first video is that the first video uses "Fruty Balance" to shorten the sound release.
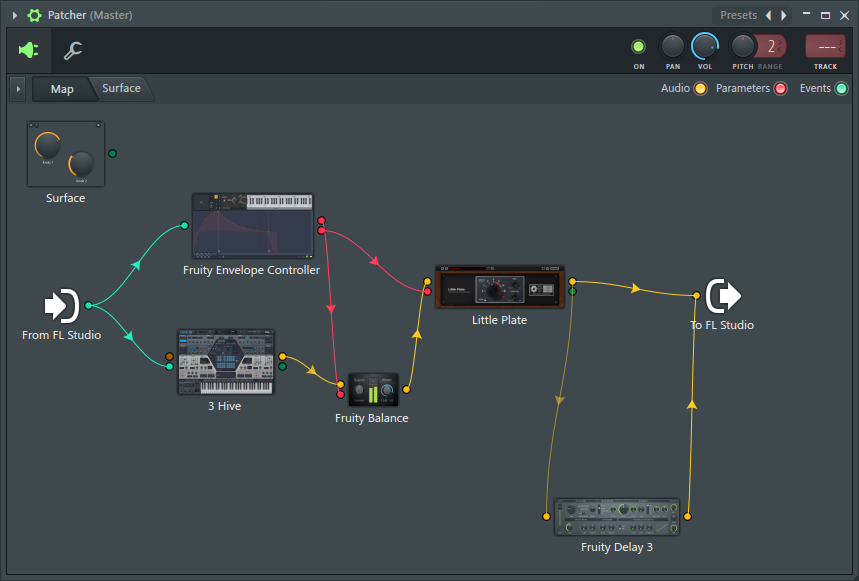
There is nothing particularly difficult, but I will post an image for the time being.
(Controlled by two separate envelopes using two "Fruity Envelope Controllers")
Summary
It is good to move the parameters with velocity.
Doing the same thing at the mix stage would be a lot of work.
I think it's the same as a project, but the cost is lower if you deal with it upstream.
I think that the cost will be reduced as a result of the person who makes the song, if he / she draws out what he / she can do before the mix rather than the mastering direction.
![[Free] Introduction to OZ-Soft's sound control plug-in Xpander 24 2021 11 02 15x51 51](https://chilloutwithbeats.com/wp-content/uploads/2021/11/2021-11-02_15h51_51.png)
Comment