Create an auto filter using FL Studio's fruity peak controller
This is yosi from Chillout with Beats.
I tried to make it modular and tried to see if it could be done with FL Studio, and it was easy.
FL StudioFruity peak controllerBecause there is, you can easily move the filter with the auto filter and LFO.
This time the filter is also included with FL StudioFruity Love FilterIs used.
FL Studio users can try it right away.
Fruity peak controller and Fruity Love Philter settings
Load the Fruity peak controller and Fruity Love Philter into the mixer.
It doesn't matter which order comes first or later.
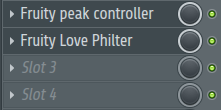
Assign Peak of Fruity peak controller to Cutoff
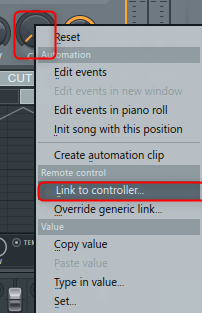
Right-click on "CUT" of Fruity Love Philter and click "Link to Controller…".
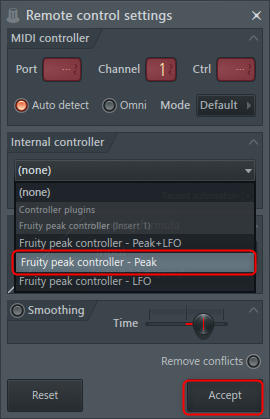
Select "PEAK" from the "internal controller" drop-down list and click "Accept"
Adjust PEAK movement with Fruity peak controller
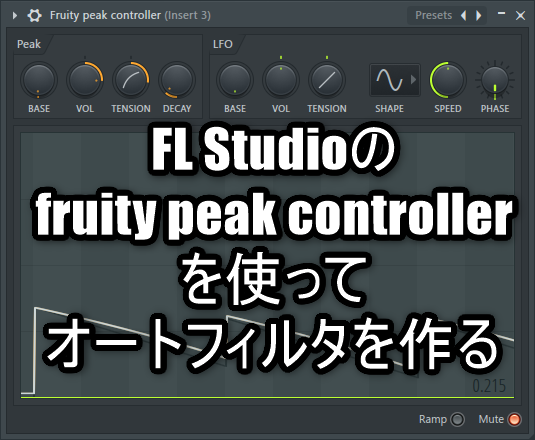
A little explanation of the parameters of Fruity peak controller is included. (Google Translate + α)
- Base – Control output base or minimum (offset).
- Volume (VOL) – Maximum control output.The controls are bipolar and the values range from -200% (maximum left) to 200% (maximum right).When using positive values, the louder the volume, the higher the peak control output value.Negative volumes have a negative "ducking" effect at each input peak, where the peak controller output is negative.This should be set in combination with the "base" level to create a "sidechain pumping" effect.Raise the bass and then turn the volume down.
- Tension – Attack and release curve shape (control graphic shows effect).
NOTE: Most sounds have a very short attack, so this parameter has no effect.Most useful on the decay side of the envelope. - Decay – The time it takes to decay to the "base" level.
It is necessary to adjust the value according to the volume of the input source, but in this case it is the following setting.
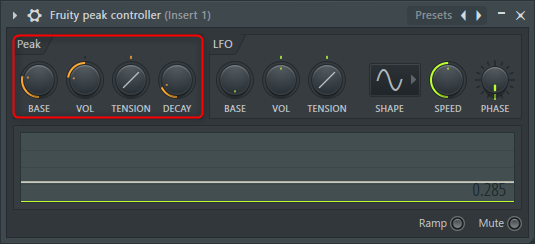
When the volume change is small, the knob does not move much.
In such a case, you can change the range of movement of the knob with respect to the volume by multiplying it by an arbitrary value with "Mapping Formula".
I took a video because it is difficult to understand in the text.
Try changing the value according to the input source.
How to change the input source
If there is a delay on the Pad, using it as an auto filter will not give you a beautiful feeling like automation due to the strength of the sound.

Therefore, if you prepare another trigger (kick drum, etc.) and input it to the Peak Controller with that trigger, the filter will be applied neatly.
It's easy to do, just launch Peak Controller in another mixer and trigger it there.
It is a little troublesome because it is necessary to insert the trigger according to the timing of Pad, but the filter is applied neatly.
Since the trigger sound is unnecessary, no sound is output when using Mute of Peak Controller.
Creating an auto filter using FL Studio's fruity peak controller Summary
This timeFruity Love FilterI used, but you can do it with normal VST.
Even if you don't support MIDI CC poorly, you can do it this way, so it's quite convenient and flexible.
Actually, when I tried to do it with MIDI CC from Reaktor, I was in trouble because there were quite a lot of plug-ins that did not support MIDI CC.
Also, using Patcher seems to be able to do quite complicated things, so I will write an article again.
Comment