Click here for the previous articles
I have a little time, so I will explain "MOTION CURVE EDITOR" firmly.
It's a little long, so I'll write it in two parts.
(I will attach it at a later date)
"MOTION CURVE EDITOR" is not a preset but an editor that allows you to freely edit "MOTION CURVE".
It can be set quite finely, but if you edit it without knowing it, you will not be able to synchronize in bar units, so I think it is a function with a slightly high hurdle.
However, if you master this editor, you can produce various effects along the time axis, so it is a function that you should remember.
This article will be sent with the following contents.
・ Parameter explanation of "MOTION CURVE EDITOR" ① (this article)
・ Parameter explanation of "MOTION CURVE EDITOR" ② (next time)
Overview of "MOTION CURVE EDITOR"
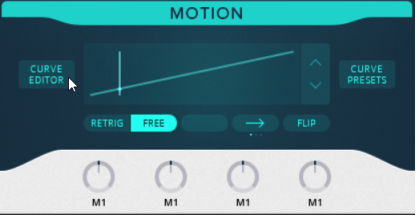
To use "CURVE EDITOR", click "CURVE EDITOR" in "MOTION".
Then the waveform and "MOTION CURVE" are displayed.
The waveform isArranged verticallyAnd "MOTION CURVE" is displayed overlapping.
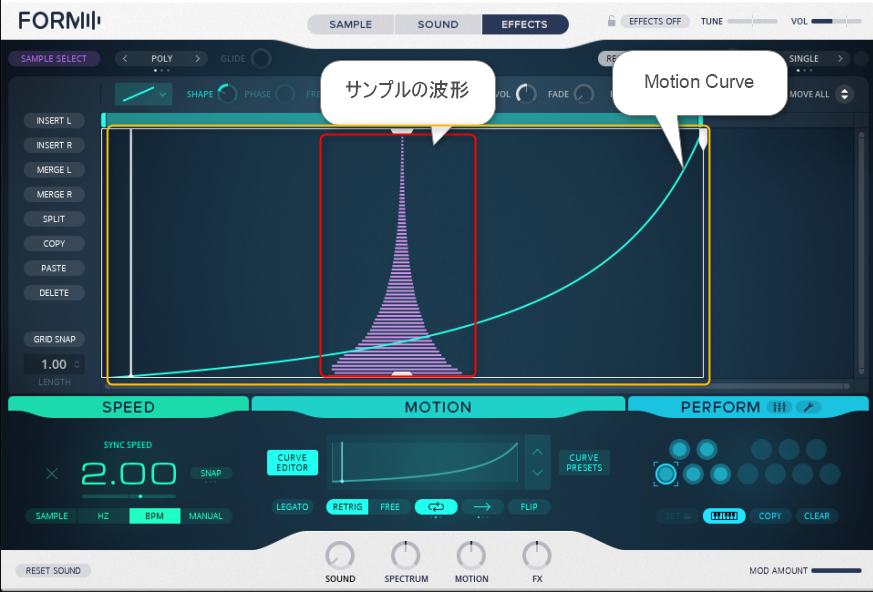
On the "CURVE EDITOR" screen, the bottom is the sample start position and the top is the end position.
This "MOTION CURVE" means that the sample is played at a constant speed when it is a straight line from the lower left to the upper right.
The sharper the angle, the faster the playback speed, and when it is right next to it, playback stops.
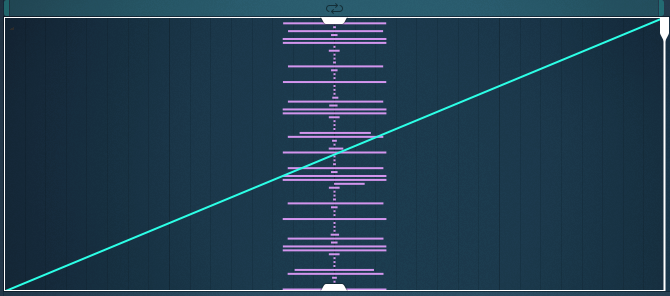
I tried to ring the straight line from the lower left to the upper right.
A drum loop is used for easy understanding.
I think it's playing at the same speed as the preview before it was first loaded.
Next, when you reach the upper right from the lower left at the half position as shown below and go down to the lower right.
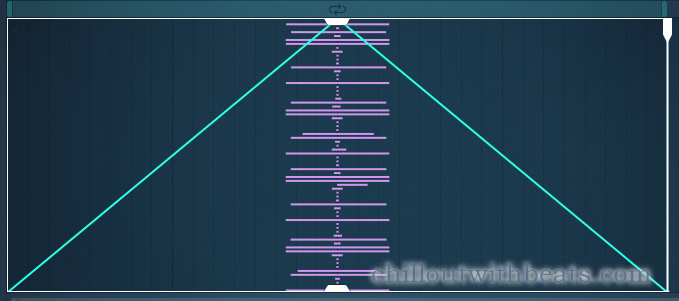
This will play the sample at double speed in the first half and reverse at double speed in the second half.
When drawing a curve as shown below.
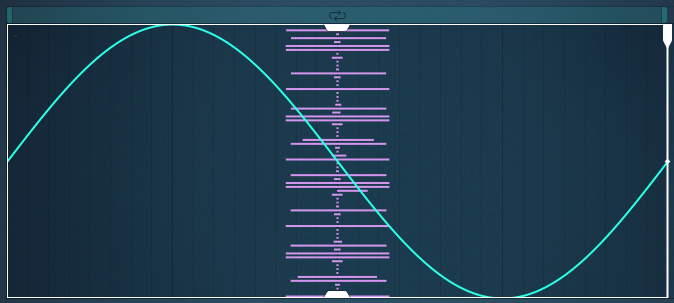
First, the start position starts from the center, and it plays back to the end at about double speed in the same way as before, and it plays slowly at the curve part.
After that, when going down from the upper left to the lower right, it is played in reverse at about double speed, and it is played slowly at the curve part.
Parameter explanation of "MOTION CURVE EDITOR" ①
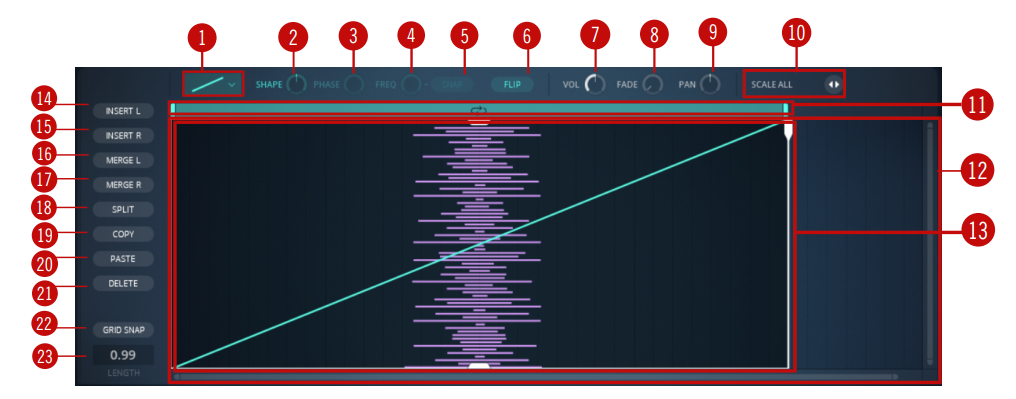
Each parameter will be explained on a manual basis.
① Curve menu
Click the drop-down menu and select the corresponding motion curve to load it into the active segment of the editor.Different curves have different editable knobs (SHAPE, PHASE, FREQ).Also, VOL, FADE and PAN can be used on all curves.The first five waveforms in the menu are played only once per segment, but the repeating waveforms (three below) can be changed to play multiple times using the FREQ knob and LENGTH control, for example a pulse. You can create behaviors like this.The available curves are:
▪ Flat lines
▪ Rising line
▪ Double curve
▪ Triangle
▪ Sine
▪ Repeating lines
▪ Repeating Triangle
▪ Repeating Sine
It is a selection of "MOTION CURVE".

The parameters that can be used in (XNUMX) to (XNUMX) change depending on the "MOTION CURVE" you select.
② SHAPE
Turn this knob to either side to further define the shape of the waveform selected in the Curve menu. SHAPE edits the shape between the peaks of a waveform, such as adding a curve to a linear waveform, similar to pulse width control.
This parameter can be used only for sine wave systems.
It works like this.
③ PHASE
Turning this knob left or right changes the phase of the waveform along the time axis.
You can shift the start position.
④ FREQ
Turn this knob left or right to set the number of iterations within the segment.
You can repeat it.
When "⑤SANP" is enabled, the waveform snaps to the grid.
⑤ SNAP
When switched on, the FREQ knob snaps onto the grid.
⑥ FLIP
Click to flip the entire motion curve horizontally.
It is a horizontal inversion.
⑦ VOL
Sets the output level of the segment.
A single segment is simply a volume, but if there are multiple segments, the output level can be changed for each.
⑧ FADE
Turning it clockwise lengthens the attack phase of the segment.
It can be set for each segment, and it seems to fade in and out.
As a use, I think that you can loop with less discomfort if you use it moderately when setting the loop.
⑨PAN
Turning it in either direction pans the output audio to the corresponding side when playing the segment.
You can set the pan to the left or right for each segment.
⑩ Scale All
Click and hold the arrow button and drag up or down to set the segment length.This is useful for waveforms with many repetitions, and you can increase the number of repetitions of the waveform in the segment by increasing the length.
You can change the length of multiple segments at the same time.
The vertical axis is good, but when changing the horizontal axis, you need to be careful about the "Length" displayed in the lower left.
If you do not set this length to a good number such as "1.00" or "2.00", the tempo and timing will not match.
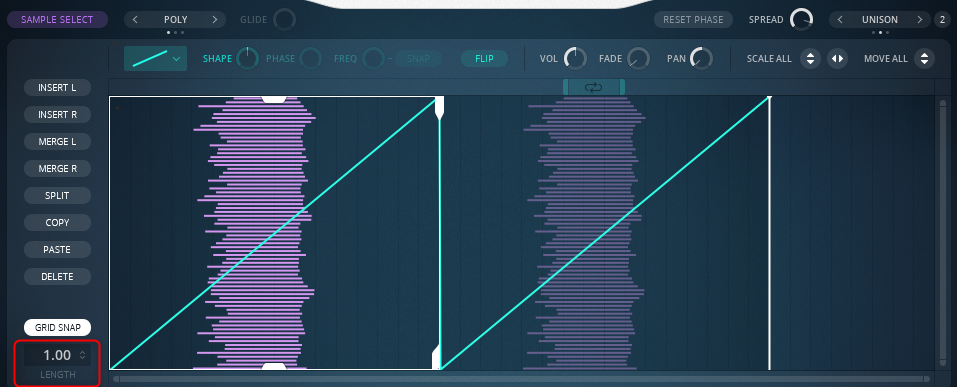
It is convenient because you can change the length of all the segments together.
(Variations can be easily created by changing the length of the segment and registering it in "PE FROM".)
Summary
I will break it here once.
Knowing how to use "MOTION CURVE EDITOR" will further expand the range of sound creation.
Next time, I will explain the rest.

Comment