How to use HY-Plugins' multi-sample slicer plugin HY-Slicer2②
This is my second time using HY-Slicer2.
Last time I explained what kind of plugin it is, but this time I will explain how to use it.
In this how-to series, we plan to explain the following:
(Subject to change during the process)
・How to use “Sampler” and “TrackFX” (this article)
・How to use “Slicer”
・How to use “Step FX” and “Multi FX”
・How to use “Grid SEQ”
・How to control patterns using MIDI from your DAW
You can purchase it below.
How to use “Sampler” and “TrackFX”
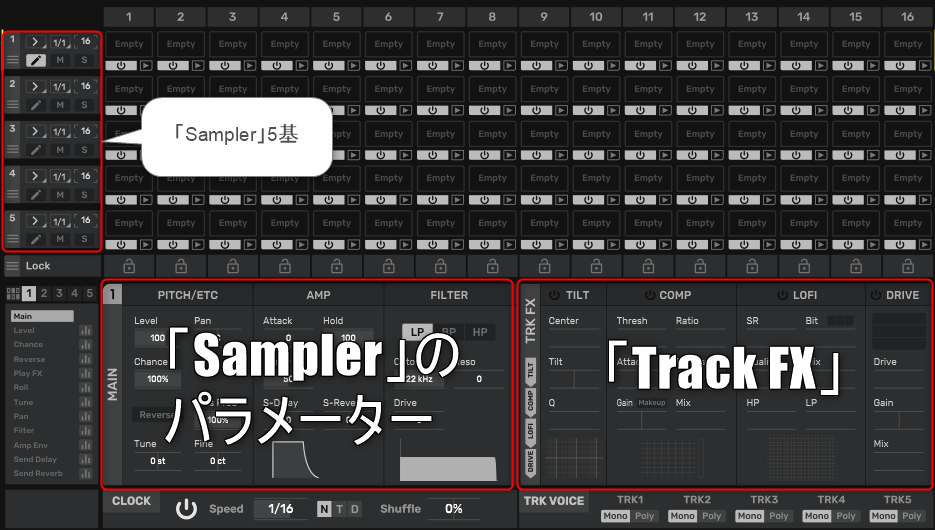
I will explain how to use "Sampler" and "TrackFX".
One “Track FX” is also fixed for one “Sampler”.
How to use “Sampler”
Pressing the Edit button will display this panel where you can edit the sampler parameters.
"Sampler" is actually very powerful.
We will briefly explain the basic functions.
First of all, please note that "Slicer" and "Sampler" are different things.
"Slicer" is independent and looks like external waveform editing software.
Click the pencil icon to edit in Sampler.
(You can also edit by clicking the number at the bottom left)
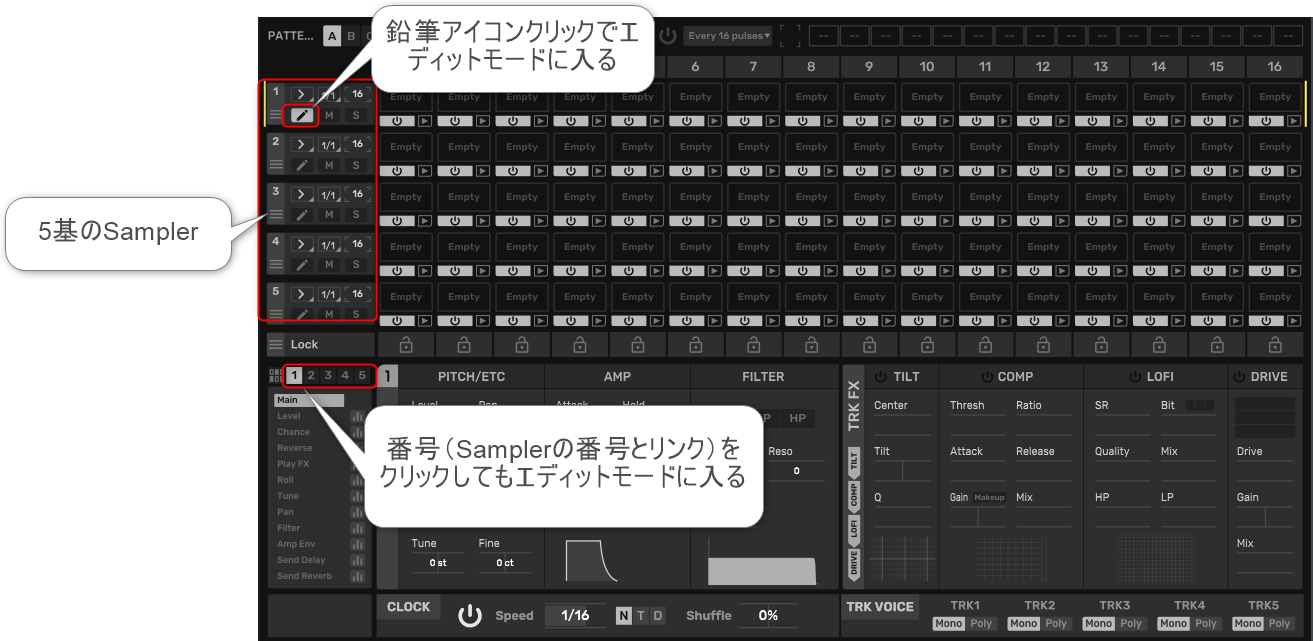
In the main edit of "Sampler", you can edit "PITCH/ETC", "AMP", and "FILTER".
"PITCH/ETC"
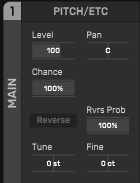
You can mainly set the pitch, Pan, probability of sound, reverse, etc.
The parameters are as follows.
Level: Set the level of the sampler amplifier.
Bread: Adjust stereo pan position
Luck: If set to 0%, slices assigned to this track will never be triggered.
Reverse: Slices are played in reverse.
Rvrs Prob: Set the probability of reverse control.
Tune:Control transposition (+/- 12 semitones)
Finish: Control detune (±100 cents)
"Chance" and "Rvrs Prob" are explained in more detail.
"Chance" is a parameter that allows you to set the probability, and if it is 50%, it will be triggered with half the probability.
"Rvrs Prob" allows you to determine the probability of reversing using the reverse "Chance" parameter.
I made a video.
If you lower the "Chance" parameter, the probability of it ringing will decrease, and sometimes it will ring and sometimes it won't.
Also, if you lower the "Rvrs Prob" parameter, the probability of reversing will decrease and it will only occur occasionally.
"AMP"
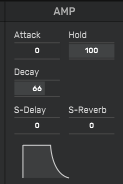
Sets how the sound changes over time.
You can set A and D plus Hold in ADSR.
Also, for "S-Delay" and "S-Reverb" you can set the amount sent to the send effect.
The parameters are as follows.
Attack: Sets the attack time of the amp envelope.
Hold: Sets the hold time of the amplifier envelope.
Decay: Sets the decay time of the amp envelope.
S-Delay: Set the amount of signal sent to the delay effect.
S-Reverb:Sets the amount of signal sent to the reverb effect.
"FILTER"
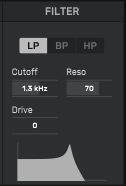
Filter settings.
You can set the type, cutoff, resonance, and drive.
The parameters are as follows.
LP/BP/HP: Select filter type (lowpass, bandpass, highpass)
Cutoffs: Set filter cutoff frequency
Made: Set resonance level
Drive: Drive amount
Step Control
Up to this point, it's a basic function, so there's nothing particularly noteworthy about it.
However, this "Step Control" is amazing.
Although it is not mentioned much in the manual, it is very easy to use and wonderful.
There are 11 types of "Step Control".
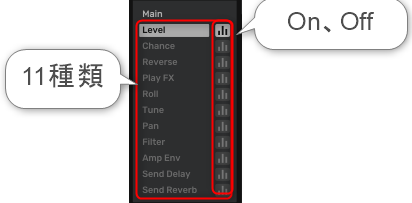
Nine of the 11 types are linked to "Sampler" parameters.
(If you use "Step Control", you will not be able to change these parameters from "Sampler")
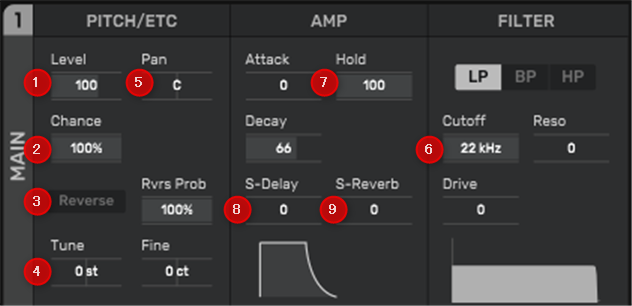
②Chance
③Reverse
④Tune
⑤Pan
⑥Filter
⑦Amp Env
⑧Send Delay
⑨Send Reverb
"Play FX" and "Roll" are unique effects that have parameters for each step.
"Play FX"
Produces an effect similar to GrossBeat where you scratch the pitch.
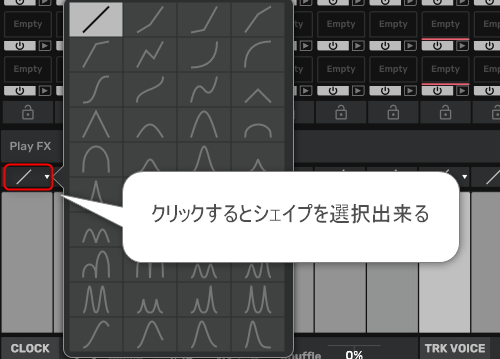
"Roll"
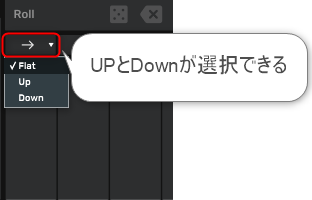
"Step Control" allows you to change parameters on the time axis with a step sequencer.

I prepared a video.
How to use “TrackFX”
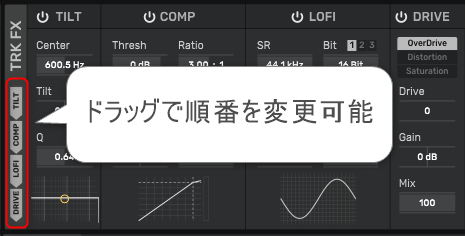
There are four effects per sampler track. You can change the processing order by dragging the horizontal effect labels up or down on the left side of this panel.
“TrackFX” is displayed on the right side of the same screen as “Sampler” editing.

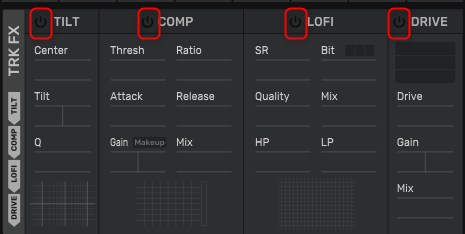
"TrackFX" is equipped with Tilt, Compressor, Lofi, and Drive.
It's a bit difficult to enable, but you can enable it by pressing the power icon to the left of each effect.
The order of each effect can be changed by dragging.
Tilt

An equalizer effect that emphasizes or suppresses the high and low pitches of the sound.
The parameters are as follows.
Center: Set center frequency
Tilt:Control the tilt
Q: Set the Q factor (cutoff slope shape).
compressor
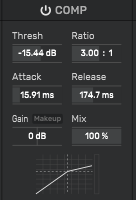
This effect controls the peak level of the input signal.
thresh: Set the threshold level. The compressor is triggered when the signal level exceeds .
Ratio: Set the ratio.
Attack: Set the attack time.
Release: Set the release time.
Gain: Set output gain
mix: Adjust output mix balance
makeup: Makeup When turned on, the output signal level is automatically adjusted.
praise
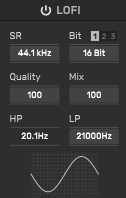
This effect contaminates the input signal.
SR: Setting the sampling rate
Bit: set bit depth
1/2/3: Select bit reduction type
Quality: Set the bit reduction quality.
mix: Mix Adjust output mix balance
HP: Set the cutoff frequency of the high-pass filter
LP: Set the cutoff frequency of the low-pass filter.
Drive

Overdrive/distortion effect
Overdrive/Distortion/Saturation: Select drive type
Drive:Set the drive level.
Gain: Gain Adjust output gain
mix: Adjust output mix balance
Summary
It's a really nice plugin.
It's fun to use.
I've added how to use "Slicer" and how to use "Step FX" to my planned explanations, so next time I'll write about either one, or if I have time, I'll write about both.

![[Free] Introduction to Ronan Fed's Pneuma Pro, a synth sound source suitable for Trance 31 2024 01 09 22x22 39](https://chilloutwithbeats.com/wp-content/uploads/2024/01/2024-01-09_22h22_39.png)
![[Free] Introduction of Midilab's TB-303 clone JC-303 32 2024 01 11 22x13 21](https://chilloutwithbeats.com/wp-content/uploads/2024/01/2024-01-11_22h13_21.png)
Comment