How to use Reaktor Create your own Filter 2nd time
This is yosi from Chillout with Beats.
This is the second time to create your own Filter.
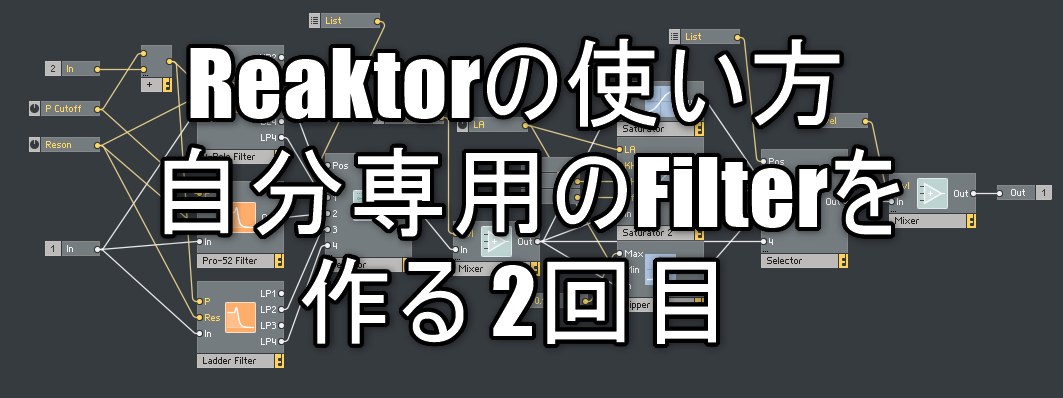
This time, we will add multiple saturators to the Filter created last time so that it can be switched and turned on and off.
The previous article is here.
By default, Reaktor has many saturators, clippers, and shapers, including:
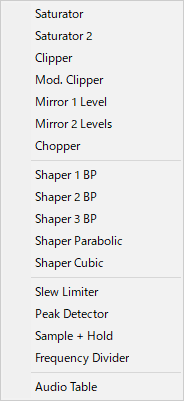
Addition of Saturator modules with Reaktor
To add it, right-click in the Instrument and select "Built-In Module"-> "Audio Modifier". This time, add the above three "Saturator", "Saturator 3", and "Clipper".
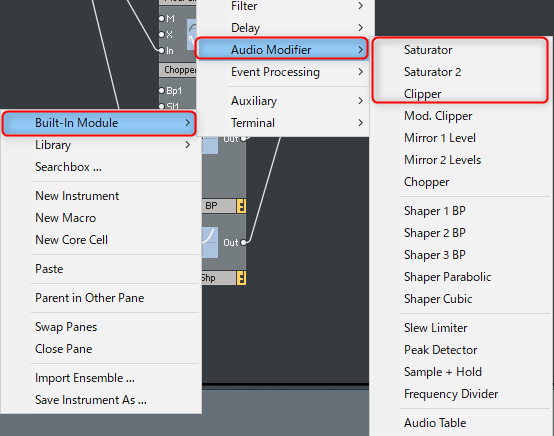
The explanation of each module is also simplified.
(It's Google Translate, but I don't understand the meaning at all. I think it's better to rely on your ears.)
saturator
Soft saturation module.The amount of saturation depends on the level of input.
There are no parameters.The purpose of this time is to prevent sound cracking (digital noise) immediately when oscillating with a filter.

Saturator 2
A more advanced version of Saturator.You can access additional parameters that affect the characteristics of saturation.

THE : Saturation level
HA: HA: Knee strength
KHA: Asymmetric knee strength
Offs: Offs:Input offset
Clipper
Clips the input when the specific threshold level defined for the maximum and minimum inputs is exceeded.

Max:Maximum input threshold
Min: Min:Minimum input threshold
Gain control and switch module addition in Reaktor
Saturator does not saturate unless the input level exceeds the threshold, so add "Mixer" before and after the saturator to adjust the volume.
Right-click and click "Built-In Module"-> "Signal Path"-> "Amp / Mixer".
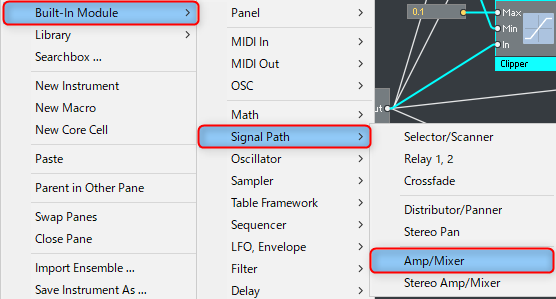
Do this one more time and prepare a total of two Mixers.
Next, right-click and add "Built-In Module"-> "Signal Path"-> "Selector / Scanner" in the same way.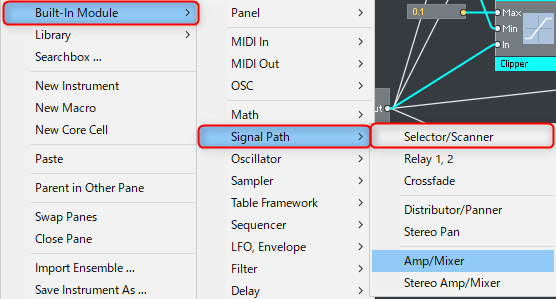
Wiring of each module
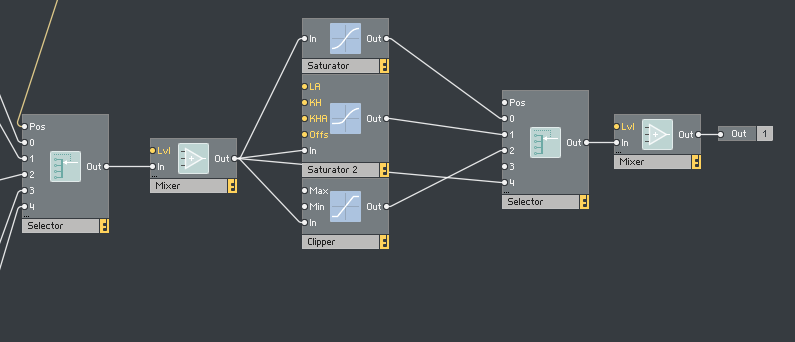
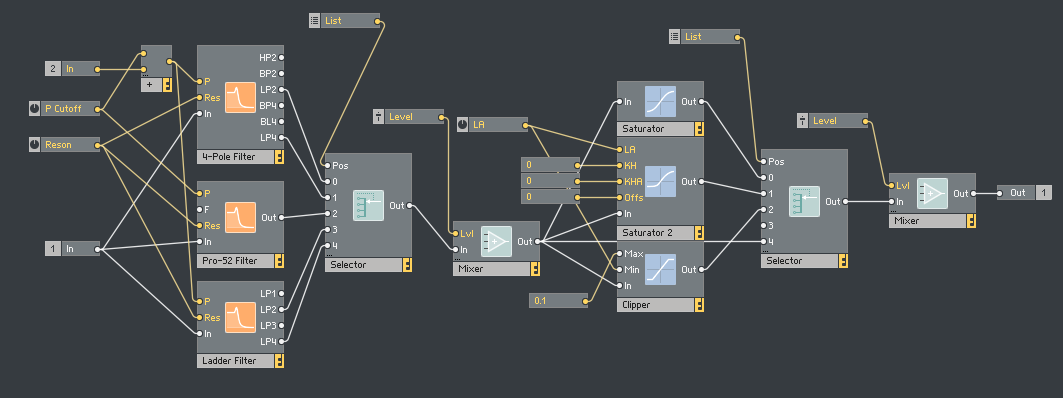
First, connect the Mixer after the "Selector" that you made last time, and make each Saturator.
Next, connect to "Selector" from above, and connect "Out" of "Selector" to "In" of "Mixer".
Finally, connect "Out" of "Mixer" to "Out" to complete the wiring.
To make one Bypass, connect from "Mixer" to "1" of "Selector".
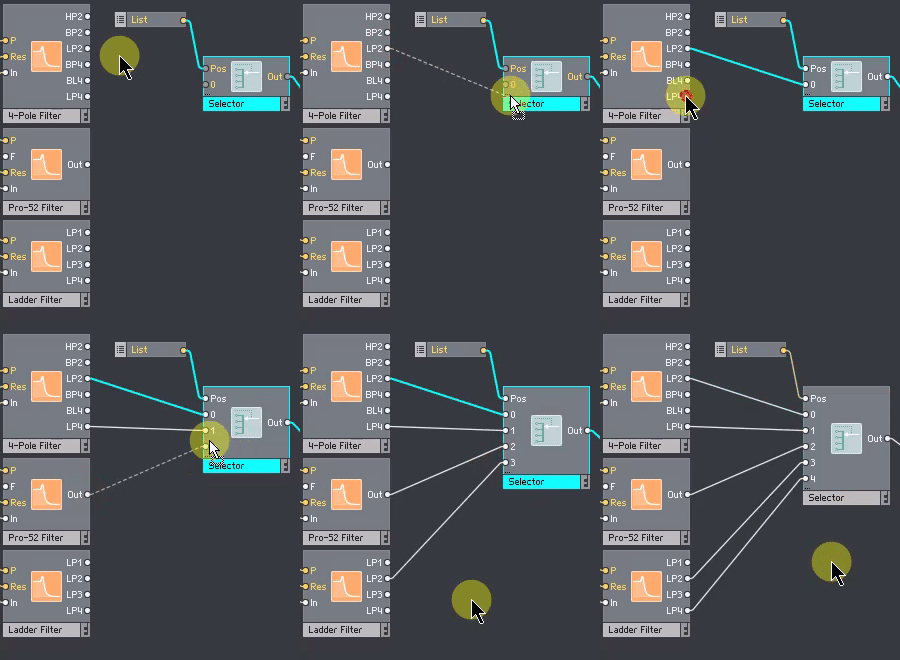
Here are some tips, but when connecting to "Selector / Scanner"Ctrl If you connect the wire while pressing, the input will increase without permission when connecting the second one.
Add a controller to each Saturator module
"Saturator" has no parameters that can be controlled, so it is from Saturator 2.
Saturator 2 controller
Right-click on "LA" and add "Create Control".

You can also right-click and select "Create Control" to create a controller for other "KH", "KHA", and "Offs", but the number of knobs will increase in the panel and it will be chaotic.
I tried to make all the controllers this time.
Some knobs cannot be used by switching the switch, so I think it's hard to use.

If it's not very important, use "Constant" and set the value.
I think it's best to judge this area by listening to the actual sound.
This time, "KH", "KHA", and "Offs" use "Constant".Right-click on the label and click "Create Constant".
(The value is set to "0", but you can change the value to your liking.)
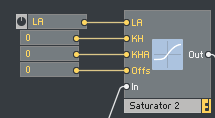
The default value is set for "Constant".
Clipper controller
"Max" was set to "0.1" in "Constant" so that it would be distorted immediately.
This is a matter of taste, so I think it's okay to make a controller.
"Min" connects "LA" of "Saturator 2".
This is also a matter of taste, but I don't want to put invalid knobs on the panel as much as possible, so I share it with other controllers.
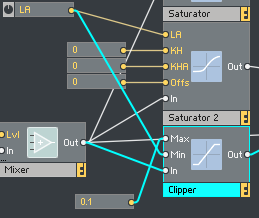
Mixer controller
To be able to change the volume of the mixer, right-click on "Lvl" in "Mixer" and click "Create Control".
A slider is created on the panel by default.
It's a matter of taste, but you can change it to a knob in the following ways.
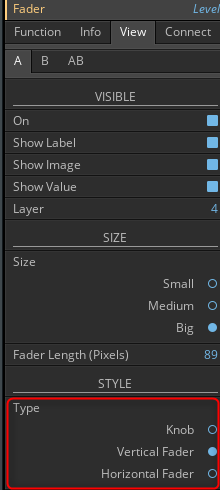
Click the Level controller and click the View tab in the side pane.
If you change "Vertical Fader" of "STYLE" to "Knob", it becomes a knob.
Selector settings
After that, set the List with Selector.
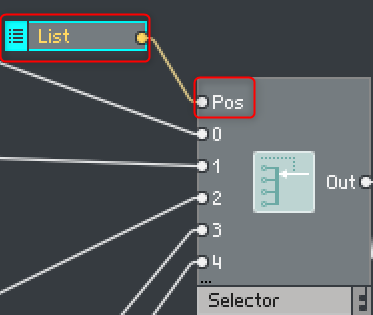
Right-click and add "Built-In Module"-> "Panel"-> "List".

Connect "List" and "Pos" of "Selector / Scanner".
Change the layout of panels with Reaktor
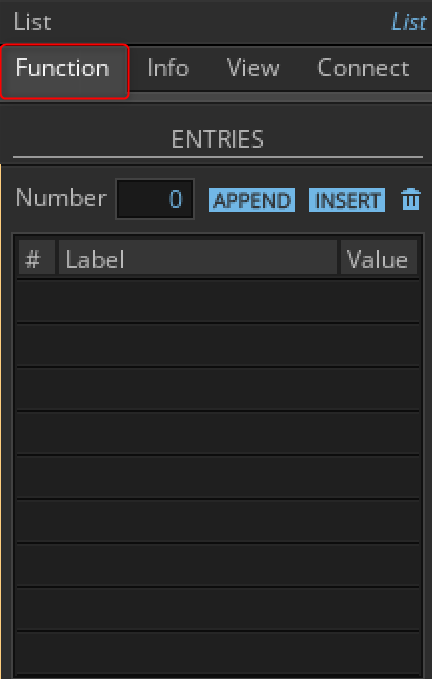
Click List and then click the Function tab in the side pane.
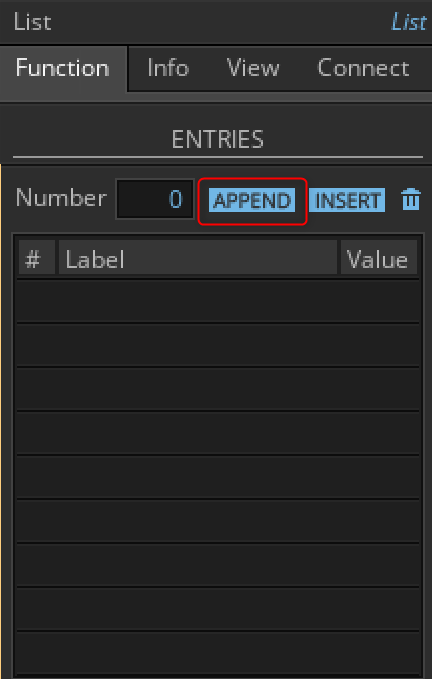
Click "APPEND" of "ENTRIES".
Set "Number" to "3".
Then click "Insert" at the top.
Change the top Value to XNUMX.
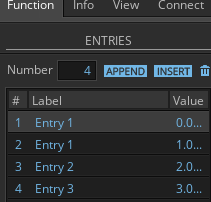
I will name it "Label".
I think the name of the abbreviation system that you can understand is good.
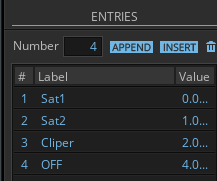
The final result is as follows.
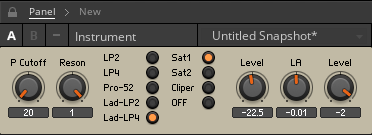
The structure is as follows.
bonus
The LP4 of the Ladder filter oscillates beautifully, so I tried to see what would happen if I sent a MIDI note here.
I also added "Diffuser Delay" from "Built-In Module".
It's simple to do, but it's easy to make interesting sounds.
It's really fun, so it's a plugin that I want many people to use.
How to use Reaktor Create your own Filter 2nd summary
It's easy, but you can customize it in various ways, so you can get a lot of ideas.
In a sense, it has a higher degree of freedom than modularity, so I think it really depends on the idea.
Next time, I will make Filter last for the time being.

Comment