How to use Reaktor Add LFO to Delay XNUMX
This is yosi from Chillout with Beats.
This is the second article that adds an LFO to Delay three times.
The previous article is here.
What you can learn in 3 articles
・ You can get the knowledge necessary for BPM synchronization.
・ Utilization of macros and stacked macros
The content of the article three times.
2nd (this article) BPM synchronization
Switch controls with the third stack macro
How to use Reaktor How to synchronize the BPM of the LFO module
It's simpler than when it's Delay.
First, add a Selector that switches synchronization ON and OFF.
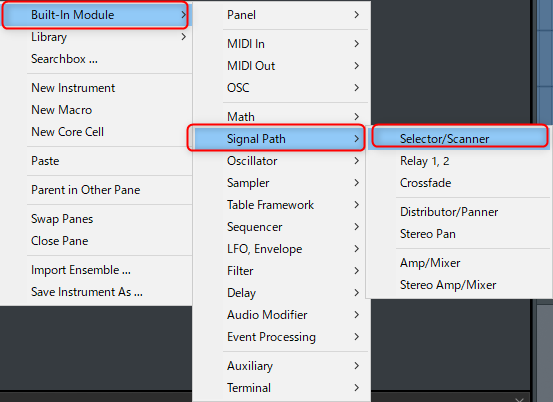
Right-click and click "Built-In Module"-> "Signal Path"-> "Selector / Scanner".
Then right-click and click "Built-In Module"-> "Panel"-> "Button".

A button will be added.

Double-click to name it "Sync".

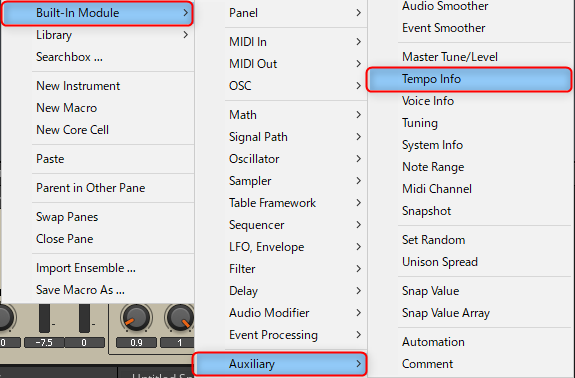
Right-click and click Built-In Module-> Auxiliary-> Tempo Info.
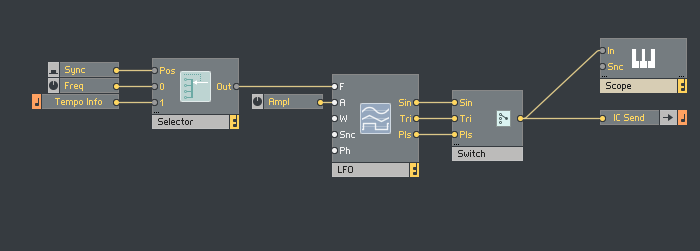
Connect "Sync" to "Pos" of "Selector / Scanner" and "Freq" to "0".
"Temp Info" is Ctrl Hold down to connect.
Also, right-click and click "Built-In Module"-> "Signal Path"-> "Selector / Scanner".

Increase the Selector's input to six.
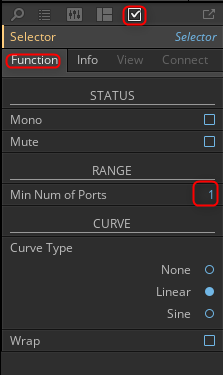
Click Selector / Scanner and set Min Num Of Ports to 6 from Function in the side panel.
I want to display it in List, so right-click and click "Built-In Module"-> "Panel"-> "List".

Connect "List" to "Pos" of "Selector / Scanner".
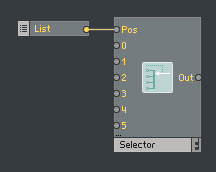
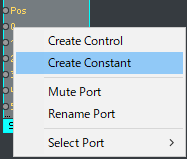
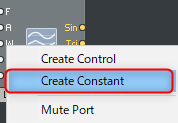
Right-click on "0" to "5" of "Selector / Scanner" and click "Create Constant".
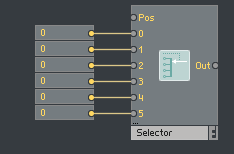
Set the values in order from the top.
Enter 8,4,2,1,0.5,0.25.
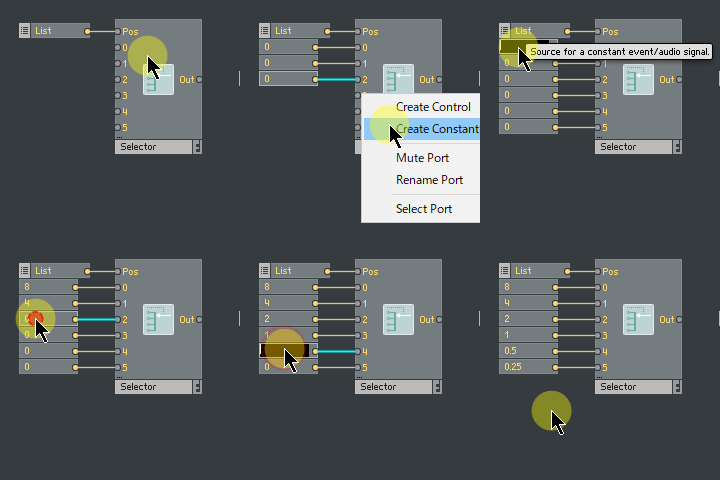
Click "List", set "Number" to "6" in the side window, and edit the label as follows.
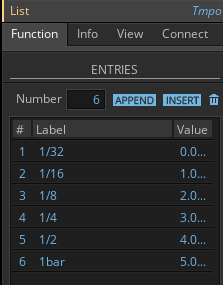
Right-click and click Built-In Module-> Math-> Multiply.
Connect the "Selector / Scanner" created earlier and the "Selector / Scanner" with BPM synchronization ON / OFF with "Multiply".
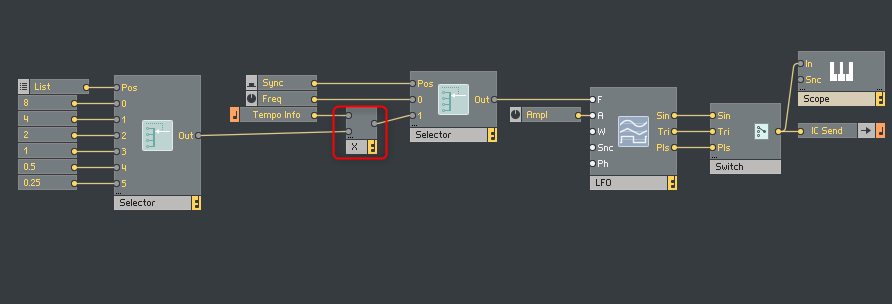
This is the end for the time being.
Increase the types of LFOs
I'm lonely with 3 types, so I'll add 2 more.
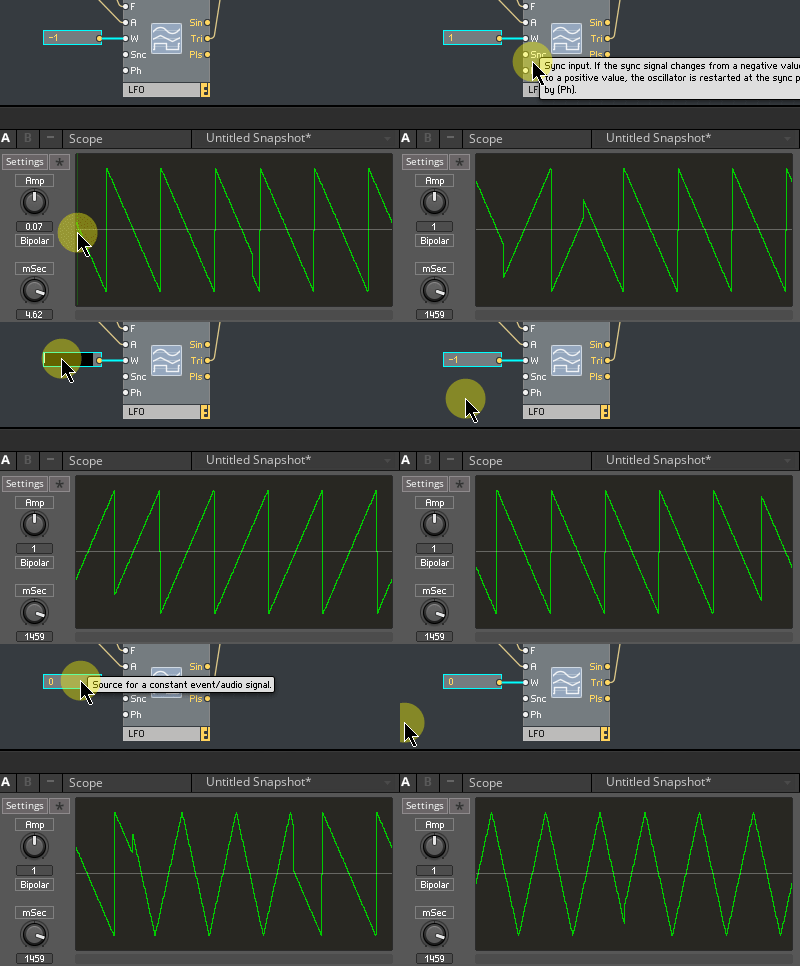
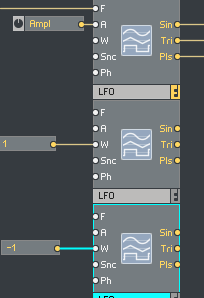
This is also simple, but all you have to do is duplicate the LFO and put "1" and "-1" in the Width.
Right-click on the LFO and click Duplicate.
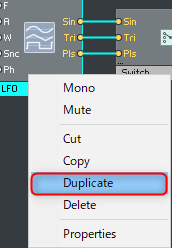
When duplicating, the wiring of the cable is also duplicated, so delete the cable once.
Right-click on the cable and click Delete Wires.
![]()
Right-click on the "w" of the duplicated "LFO" and click "Create Constant".
Change the value of the created Constant to "1".

Repeat exactly the same thing and change the value of Constant to "-1".
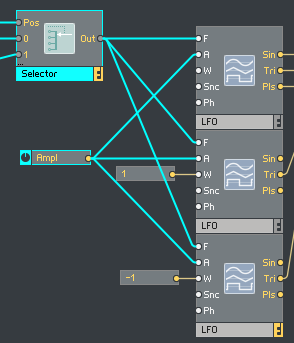
Connect the "Amp" to the "A" of the "LFO" and the "Out" of the "Selector" to the "F" of the "LFO".
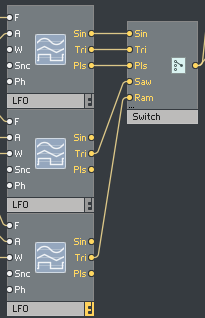
From the "Tri" of the created "LFO", hold down Ctrl and connect to the "Switch".
Also change the labels to "Saw" and "Ram".
Reset the LFO start position when starting the DAW
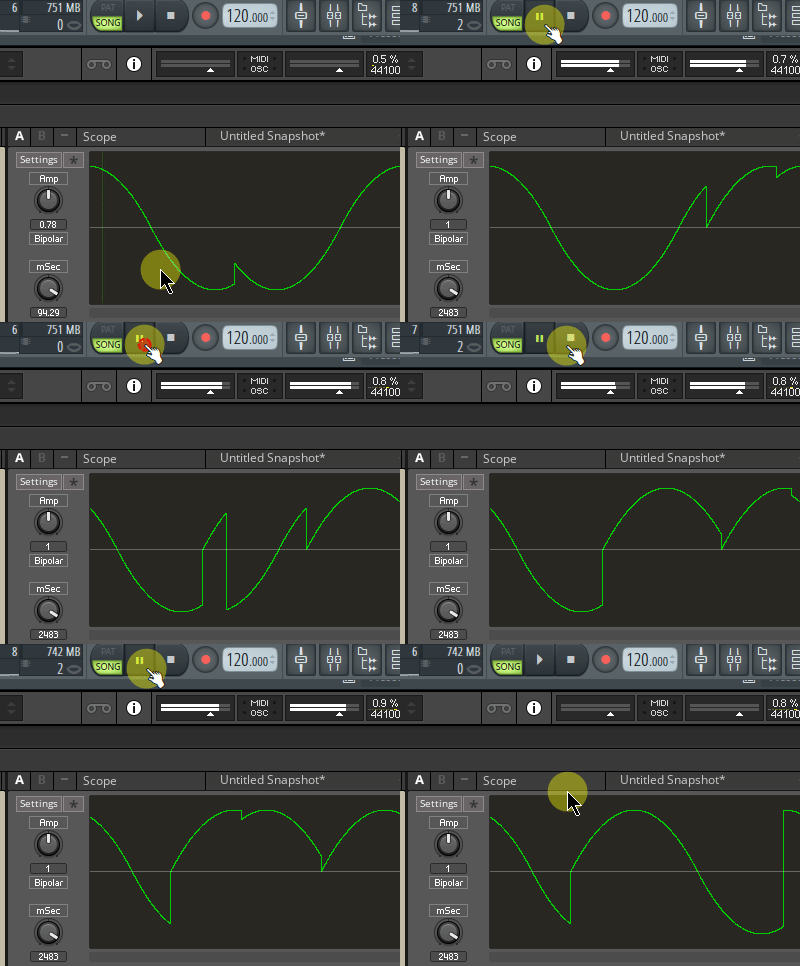
If you do not reset the LFO start position during DAW playback, the sound will change each time you play it.
The method is also easy and there is a "Start / Stop" module, so use this.
Right-click and click "Built-In Module"-> "MIDI In"-> "Start / Stop"
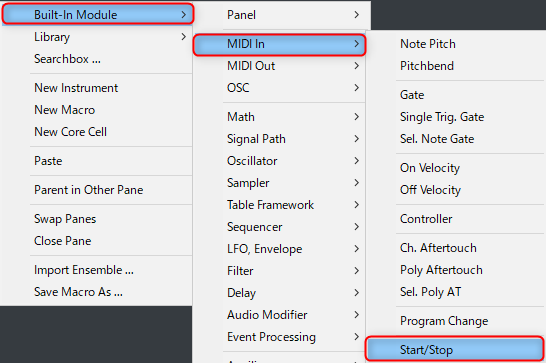
Connect the "Rst" of the "Start / Stop" to the "Snc" of the three "LFOs".
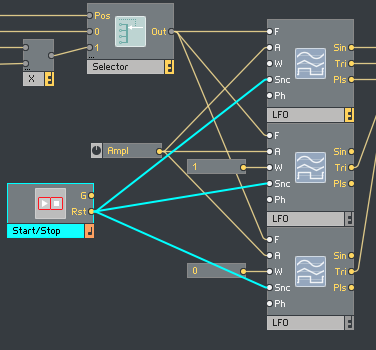
This will reset the LFO every time you play your DAW.
How to use Reaktor Add LFO to Delay XNUMX Summary
Now you can implement LFO BPM synchronization and start position reset at DAW start.
The rest is to switch the control with the stacked macro and change the LFO range by switching between Unipolar and Bipolar.
Next time, we will deal with these two.

Comment