FL Studio Harmor Japanese translation manual
I'm yosi, the maintainer of Chillout with Beats.
We will continue to translate FL Studio into Japanese.
Since it is long, I will create it separately for the first half and the second half, and combine them later.
It's basically Google Translate, but if it's terrible, I've fixed it.
I also added some images and videos to make it easier to understand.
Harmor, Vocodex and Gross Beat are recommended for sale now.
Overview of Harmor
Like its predecessor, Harmless, Harmor has a powerful additive synthesis engine.The module looks familiar to subtractive synthesizer enthusiasts: oscillators, filters, phasers.These are introduced in Harmor, but they are performed with additive synthesis data rather than audio, so they are more free to use.
Add / Subtractive Synthesis-Harmor does not have an audio stream, instead a table of frequency and amplitude data is manipulated efficiently and accurately in a way that traditional methods of processing audio streams are not possible.Shape the filter and control every aspect of the sound generation process.Image and Audio Recomposition-Drag and drop image and audio files (WAV, AIFF, WavPack, MP3, OGG, REX1 & 2) into Harmor to provide "sampler quality" playback of sound or use in combination. You can use image-based compositing if you like in your favorite image editor. Just cut and paste between Harmor and the editor of your choice.
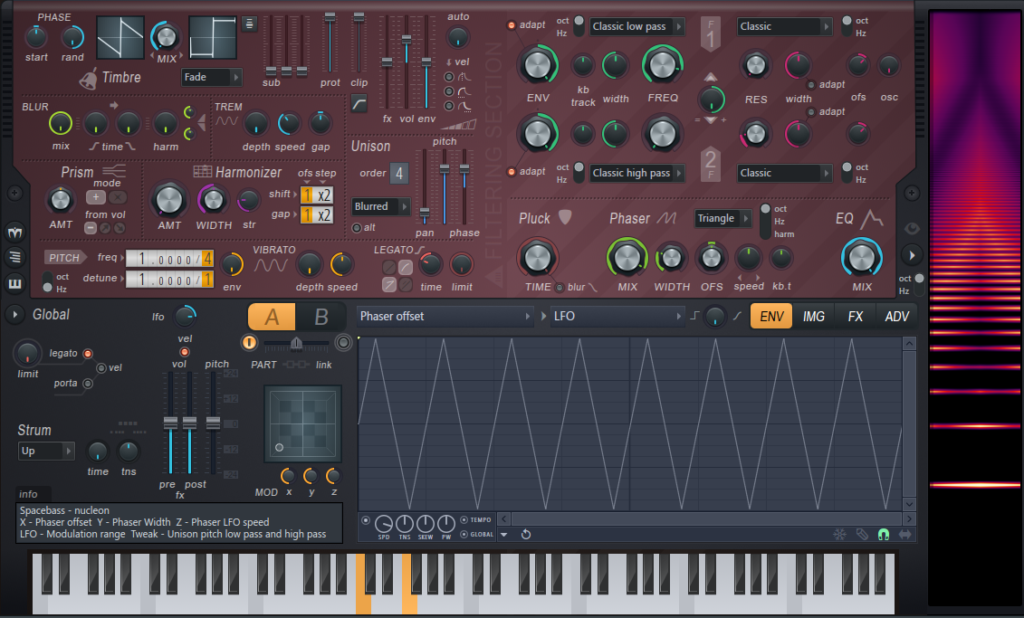
Harmor's main features
Harmor's design philosophy is "the more", and all functions, controls, and harmonic functions have been carefully selected for maximum effect.
Additive engine-Performs add / subtraction synthesis as efficiently as traditional "subtraction" synths. Multi-modal synthesis – Classic subtraction + audio resynthesis + image synthesis.
Specialized processing units – prisms, plaques, blurs, filters, phasers.
Modulation-Advanced multipart articulation envelope.
Main Controls
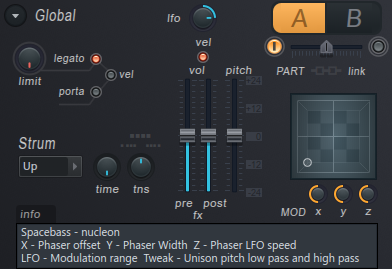
- Global enviroment – The “Global” control is related to the performance and composition “Part” A / B selection.
- Part controls – Each global part (A and B) has the same set of compositing options (shown in the purple section at the top).The order of the units can be changed quickly in the ADV (advanced) settings.
- Articulators – Harmor has two parts Global Articulation (Envelope) Each target is modulated by multiple articulation parts at the same time.
- Image (per part) – The IMG (Image Recomposition) section works with images or samples.
- effects (global) – A complete suite of expected “effects” such as distortion, chorus, delay, reverb and compression.
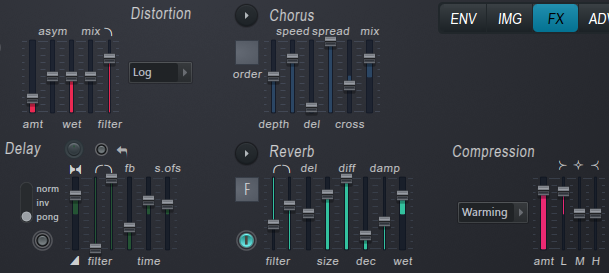
- Advanced – Independently change the “unit order” of A / B synthetic parts to effectively use more CPU power than the “futuristic” performance and quality settings offered by Starship Enterprise.
Stamps

By default, Timbre 1 and Timbre 2 generate sawtooth and square waves, respectively.When you mix tones, the tones change. You can right-click the Timbre window to load an audio file, drop an audio file into the window, or edit the Timbre harmonic mapping (level and phase) to create a custom waveform.The output from the timbre section is combined with the image / resynthesis section (if active).
The waveforms in the timbre section are additively generated according to the following controls:
Timbre – The default tones are sawtooth and square waves.See the tone options below for information on how to change the waveform.
PHASES

- start – The starting phase of the waveform is 0 to 359 degrees.
- Border – Turn to the left to randomly randomize each partial phase individually, which helps to add characters when using Pluck.Turn to the right to set the phase of the global waveform to "free running" mode. Unison avoids retriggering the "flanger" sound and adds a phase variation retrigger note.
Stamps

- Timbre windows – The timbre window holds a single cycle waveform and is used as an oscillator source. Timbre 1 and Timbre 2 are related in that they share the same harmonic phase information (so there is only one harmonic phase envelope per component).Phases are shared, so tones are not phase-cancelled when mixed.In default mode, Timbre 1 and Timbre 1 can be thought of as two different "harmonic level" mappings of the same base "Saw Oscillator".In addition, there are several ways to create a custom waveform.
- 1. Left-click to open the Timbre 1 or 2 Harmonic Level envelope and edit the / Harmonic phase envelope.
- 2. Right-click and select "Analyze single cycle waveformBrowser and "Harmonic level envelopeRandomize ""Randomizeto select from.
- 3. Drop the audio file in Timbre Window 1 (note that Timbre 2 uses Timbre 1's phase data).For best results, drop a high quality single cycle waveform into the Timbre window.
NOTES:
- When loading a custom waveform, Use Timbre 1 if you want to achieve a specific shape.You can set the harmonic level and harmonic phase mapping.
- Partial phase mapping data, set when analyzing waveforms with Timbre 1, and shared with Timbre 2.
- You can drag waveforms / samples / files from anywhere in FL Studio & Windows to the Timbre window with "drag and drop".
- For more information on manual waveform programming, seeTimbre harmonic mappingSee the section.
- MIX – Mix the two tone windows.
- Timbre blending mode (menu) – Choose from several crossfade options.

-
- Trays – Standard crossfade from Timber 1 to Timber 2.
- subtract – Tone 1 is deducted from Tone 2.
- Multiply – Multiply tone 1 by tone 2.
- Maximum – The maximum harmonic level is selected from timbres 1 and 2.
- Minimum – The minimum harmonic level is selected from Timbre 1 and 2.
- pluck – Blend Pluck's decay and shape.That is, the harmonics are set to match Pluck's EQ envelope.
- Sub harmonic configuration (menu) – Set subharmonics 2 and 3 to "Around" (subharmonics 2 and 3 are relative to subharmonic 1).3 octaves below each).

- Sub – These subharmonics add bass, weight, or depth to your sound.First sliderSub-harmonic 1Is always the octave below the root note.The remaining two sub-slider are "Sub-harmonic configurationDepends on (see above).If the settings are as follows:
- Around - Sub-harmonic 2Is the third harmonic,Sub-harmonic 4 TheSub-harmonic 15th harmonic of. The second harmonic is the root note.
- Below - Sub-harmonic 2Is two octaves below the fundamental wave,the fundamental と Sub-harmonic 3 Thethe fundamental3 octaves below.
- Prot -
- Low harmonic protection.The filtering feature prevents you from removing the first few harmonics that are essential to "weighting" the patch's tone.This control has an associated harmonic protection shaping mapping that allows you to set specific partials to protect.This is useful if you use phaser settings that often remove basic elements.
- clip – Clipping threshold.
- Clipping mode (menu) – Each is a different threshold curve that resembles a compression curve and indicates which amplitude level partial is “clipping”.This parameter has a corresponding harmonic clipping shaping mapping.
- fx – Impact on dry mix.
- vol – Volume envelope multiplier
- env – Frequency domain envelope multiplier.
- auto – Auto gain controls the audio level as a function of velocity and the number of notes played (similar to an audio compressor that protects the section output from clipping). advanced tabYou can set the Absolute or Relative gain with.
- Velocity mapping switches:
- Velocity to volume envelope attack time – Maps velocity to the attack time of the volume envelope.
- Velocity to volume envelope attack scale – Map the velocity to the attack time scaling of the volume envelope.
- Release velocity to envelope release scale – Map release speed to release time scaling.
BLUR
Blur paints the partial horizontally.Blur the left side (attack), right side (attenuation), top (harmonic frequency) or bottom (fundamental frequency).Use this to create preverb and reverb type sounds.

- mix – Blur mix level
- Time – Adjust the amount of Blur before and after Attack / Decay. Of Blur individually.High attack values soften transients in the resynthesized audio, and high decay values create "reverb" style effects.NOTE:If Blur is selected, you can use the "Pluck" control to replace the trailing blur.
- Harm – Amount of harmonic blur.Equivalent to partial vertical smearing.
- Harmonic blur top tension – High frequency and low frequency relative Blur.
- Harmonic blur bottom tension – High frequency and low frequency relative Blur.
Blur Articulator
- Harmonic blur amount – Mix as above.
TREM
tremolo(Tremolo) is a stereo effect with left and right panning of the sound that simulates the rotary speaker effect used in some classic organ patches.
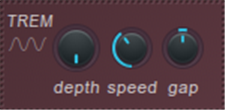
- Depth – Mix the tremolo effect with the dry signal.
- Speed – Tremolo speed. ..
- Gap – The bread range between the left and right pan positions. When set to 0, the effect is monophonic, which only affects the volume.
Prism
Prism Shifts the partial position from the original relationship to the fundamental frequency.If the subtones are overtones, the prisms generally dissonate them.This adds metallic (extreme prism) or detuning (mild prism) quality to the sound quality.NOTE: The "Harmonic Prism" articulator envelope allows you to customize the prism effect as a function of partial frequency.
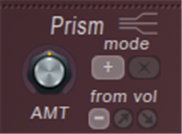
- MT – Prism amount.
- Fashion – Additive or multiplicative effect of prism amount.
- from vol – The amount of prisms depends on the volume of the harmonics, the larger the harmonics, the more prisms will be applied.Inversion applies the opposite.
Prism articulation
- Prism amount-"Amt" above.
- Shaping – Harmonic prism (mapping of partial deviations).Since this is a bipolar envelope, you can add positive or negative deviations as a function of frequency.
harmonizer
The harmonizer uses a variety of methods (+ / x octaves, or offsets) to duplicate and transpose existing overtones.
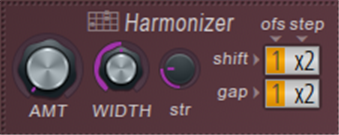
- amt – Harmonic mix.
- width – Determine how high the overtones will be cloned.
- str – Strength focuses on high harmonic clones.
- shift – Shift harmonics relative to the fundamental frequency (ofs, = offset in octaves,step = Harmonic offset). Drag up for additive offsets and down for multiplier offsets.
- gap – Gap between first and higher harmonics (ofs = offset in octaves), step = o Harmonic offset). Drag up for additive offsets and down for multiplier offsets.
Harmonizer Articulation
- Harmonizer mix-"Amt" above.
- Harmonizer width-"width" above.
Unison
Unison is a chorus-like thickening / stereo effect.Unlike the chorus applied to the final output, Unison is a note-by-note effect, and each note is given a user-defined "subvoice" (from ordering).Subvoices are given user-defined variations of pan, volume, pitch, and fading for root notes, according to the following controls:
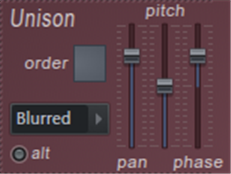
- Order – Number of unison voices.NOTE: If you are concerned about CPU load, limit the use of high union orders.
- Unison type menu – Variations in pitch and bread spread (
- Classic, uniform, blurred, Random ,Special) To select from.Set by ear.
- or – Alternatives gain polarity.
- pan – Pan the variation of the entire Unison Voice.
- pitch – Pitch fluctuation (detune) of the entire unison voice
- phase – Changes in the tone start phase of the entire Unison Voice.
NOTE: To achieve a smooth unison on high notes, set the unison phase to 100% (complete blur), but you may hear a lot of noise on low notes.
Unison Articulators
- Unison pitch thickness-The "Pitch" control above can be mapped according to many mapping envelopes.
- Unison phase – The "Phase" control above can be mapped according to many mapping envelopes.
- Unison index mapping – Independent unison voice mappings can be found in most editor targets, including Pitch, Prism, Pluck, and more.Worth mentioning is "Pitch> Unison index mapping", which allows you to set the pitch of each Unison audio individually.
Left-side Buttons
- About Harmor – Information about plugins.Uluid's Harmer-chan.
- Browse envelopes/images – When used in FL Studio, the browser opens Harmor related content.Drag the content to the target of the plug-in that contains the envelope and the image recomposite area.
- Preview keyboard – Show or hide the piano keyboard at the bottom of the plug-in.
Pitch

- oct / Hz (switch) – Octave (unweighted) or Hertz (weighted) pitch distribution.
- frequency – Frequency multiplier / divider.
- detuned – Partial sound offset / detuning with respect to the fundamental frequency.
- env – The effect of the pitch-related envelope is adjusted by this bidirectional (-1 to +1) control.
- vibrato – High speed pitch modulation.Tip: after It is useful to link an aftertouch to this knob. In FL Studio, press and hold a note, right-click the knob to open the remote control settings, and press hard on the note to complete.
- Depth – The range of deviations around the correct pitch.
- Speed – Frequency of pitch deviations.
- LegatoThe controls relate to how the note attack and release notes are combined.
- Portamento time curve (switches) – Linear logarithmic portamento (pitch slide) curve.
- Portamento / Legato time (switches) – Select a fixed glide time or variable, depending on the pitch distance and the setting of the Speed knob (positive or negative).
- team – Controls the slide time of porta and legato.NOTE:
- To be active, "Global Portamento" "port "Or"bound The switch must be activated.
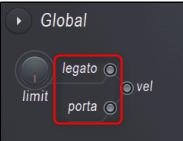
- limit – Portamento pitch limit.Limits the pitch range to which the portamento effect is applied.NOTE:
- To activate this limit, see Global Portamento,portThe switch must be activated.
Filter
The filter function controls the filter type and cutoff frequency.
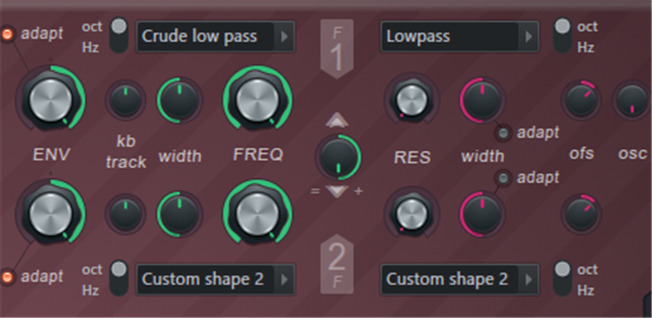
- EPS – Envelope modulation amount.The knob is bidirectional from -100 to + 100%.
- Customized – Adaptive envelope mode.The bandwidth of the filter varies depending on the frequency of the sound, so the duration of the envelope applied to both bass and treble sounds similar.Set by ear.
- oct/Hz – Set the shape of the peak of the resonant frequency to octave or hertz scale.Set by ear.
- kb track – Keyboard tracking.Applies an offset to the filter cutoff value according to the pitch. offset-value can be positive or negative depending on the direction of the knob.For example, keyboard tracking helps brighten the sound by increasing the cutoff frequency of the lowpass filter as higher keys are played.
- width – Filter bandwidth equivalent to the traditional filter "dB / Octave" setting.Narrowing the width creates a more well-defined "center frequency" or "cut" frequency.
- FREQUENCY – Filter cutoff frequency.This is the target for all green controls to the left of the knob.
- Filter type menu – Choose from a variety of cutoff slopes. ::
- low pass – Filters frequencies above the cutoff frequency.
- band pass – Filters frequencies on both sides of the central band.
- band stops – Filter frequencies in the central band.
- high pass – Filters frequencies below the cutoff frequency.
- Phaser – "Comb filter", a series of stacked band stop filters.
- Custom shape 1 & 2 – Use the ENV “Filter Shapes 1 and 2” envelopes to define your own filter shape.
- Filter 1 & 2 mix – The filter resonance section can operate in parallel or in series, depending on the position of the knob (see below).Consider proportions such as a mix of filter 1 and filter 2.In parallel, it is a mixture of both filters on the output.For cereals, put the mix from filter 1 directly into the output or into filter 2.
- Left of 12 O'Clock = (1-Mix) * F1 + Mix * F2
- Right of 12 O'Clock = (1-Mix) * F1 + Mix * (F1⇒F2)
Where:
- F1 is the output of Filter 1
- F2 is the output of Filter 2
- F1 ⇒ F2 is the output of F1 processed by F2
- mix is the value of the Filter 1 & 2 mix knob
TIP: If "UNIT" is placed after F1, F1 will be F1 + successor unit.
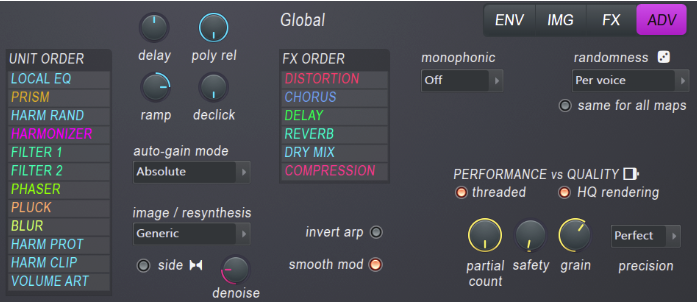
- RES – Filter resonance.This will boost the frequencies around the cutoff value (depending on the offset value).Resonance emphasizes the cutoff frequency position and creates the familiar "resonant" sound.
- Resonance type menu – Choose from resonance type variations.
- Classic – Single narrow resonance peak.
- Cuberdon, Pedestal, Sedge hat, Wide bump, Double cone – Various resonance peak shapes, named according to their approximate shape.
- Well & Wormhole – Cut-off frequency with resonance peaks on both sides of the hole.These settings are designed for use with self-oscillation to avoid annoying interference and excessively large ringing as the resonant peak passes the harmonic frequency.
- Noise - Special effects.Harmonics sound randomly. Use "RES" to control the amount of randomness and "Width" to control the length / duration of harmonic changes.
- Custom shape 1 & 2 – Use the Filter (Resonance) Shapes 1 and 2 envelopes to define your own resonance filter shape.
- low pass – The resonance peak is followed by a dip.This results in "extra lowpass", and as the resonance increases, the gradient of the lowpass filter effectively becomes steeper.
- width – Resonance peak width, left = narrow, right = wide.
- Customized – Adaptive envelope mode.The bandwidth of the filter changes according to the frequency of the note, so the resonance sounds the same regardless of the pitch of the note.Set by ear.
- ofs – Offset shifts the resonant frequency +/- 2400 cents relative to the cutoff frequency.NOTE: Since there are few or no frequencies that resonate beyond the cutoff point, if the offset moves the peak beyond the filter cutoff point, resonance may not be heard in low frequency mode.
- osc – Self-oscillation level.A sine wave is intentionally introduced at the resonant frequency to produce a clearer "sound" sound.This is useful if the offset moves the resonant peak beyond the filter cutoff point (see "ofs" above).
Filter Articulation
- Filter 1 & 2 frequency – "FREQ" above.
- Filter 1 & 2 width – "WIDTH" above.
- Filter 1 & 2 resonance amount – "RES" above.
- Filter 1 & 2 resonance offset – "ofs" above.
- Filter 1 & 2 Mix – As above.
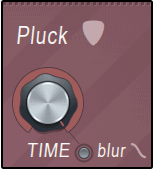
pluck
Pluck is a special attenuation related filter.To change the shape of the filterEditor target shapingSelect "Pluck shape" from.The mapping expresses the decay time (vertical) as a function of frequency (horizontal).default shape Then, the high frequency is attenuated first, and then the low frequency is advanced.This simulates a pizzicato that is bright and quickly dull.At high settings, the default repellent shape gives the tone a "damping" quality.
- TEAM – Decay time (“plaque shape” envelope multiplier).
- blur – The plaque setting isBLURReplaces the blur attenuation of the section.
Pluck Articulation
- Pluck amount
Phaser
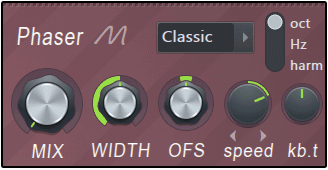
Fading is the process of creating frequency cancellations in a sound and constantly moving it. Harmor phasers allow you to phase individual harmonics rather than the entire output, or apply a "cancellation pattern" (cut template) to your timbre for a variety of interesting fading and harmonic effects. make it possible.
- MIX – Amount of fading.
- Phaser type menu – Select the phaser type.There are three broad categories:
- Classic, Triangle, Eggs – This group has settings similar to traditional phaser sounds.
- Deep, Deeper, Condom, Twins, Cascade & Box – A special fading effect that takes full advantage of the Harmor addition architecture.
- frequency - special!Modulates the frequency of all subtones of the timbre according to a user-defined envelope.
- custom – User-defined phaser envelope.
- Phaser scale – Set the scale to Octave, Hz or Harmonics.Set by ear.Use the phaser in harmonic scale mode to achieve pulse width modulation (PWM) oscillator synchronization or FM-type sound.
- WIDTH – Wider settings cause more aggressive phase cancellation.
- Ifo – Set the width setting to LFO modulation. The "lfo" characteristics are set in the main "LFO" (bottom right of the interface).
- FSO – Offset the phase mask (cancel) position.
- speed – The rate at which phase cancellation is swept across the spectrum.The control is bipolar, turning it to the left for a downward tilt and to the right for an upward adjustment.
- kb.t – Keyboard tracking adds an offset to the phase according to the note pitch note.
Phaser Articulation
- Phaser mix – "MIX" above.
- Phaser width – "WIDTH" above.
- Phaser offset – "OFS" above.
EQ
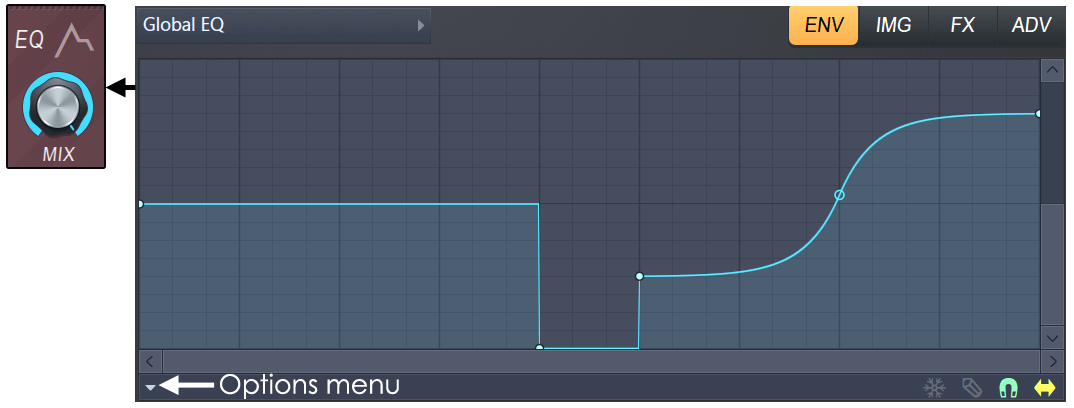
EQ or equalization adjusts the sound balance of the sound. The MIX knob controls the EQ as set in the ENV> Shaping> Global EQ envelope.By default, the EQ curve is flat, so no EQ is applied when fine-tuning the knob. Two EQ envelopes are available.
- Global EQ – The equalization curve is the same regardless of the note being played.
- Local EQ – The equalization curve follows the notes played.That is, the frequency of the EQ is related to the root note being played.
The EQ knobs in the UI control the "Global EQ" mix. The Local EQ mix is always 100%.
NOTE: There are several predefined shapes available from the Options menu.
- MIX – Wet / dry mix of EQ curves.
- Equalization curve – ENV (envelope)> Shaping (section)> Global EQ
Visual feedback
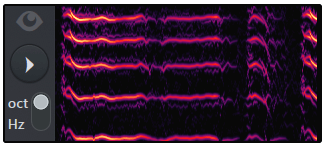
The visual feedback panel shows the partials sent to the synthesis engine, which is great for learning how Harmor's features work.Keep it open while creating the patch.It also looks cool and impressive.
- Visual feedback (switch) – Click once to open, click again to open, click again to close.For very large view mode types (or cut and paste), "You can blur the view" in the Preset Name area.
- Oct/Hz (switch) – Set the vertical scale to octave or Hz. Click here for a tutorial on Log (Octave) vs Linear (Hz) scaling.
NOTES: The visual feedback shows the monophonic harmonic series associated with the last played note.Visual feedback is CPU intensive, so close the panel if you experience high CPU load on Harmor intensive tracks.Some VST hosts do not allow plug-ins to be resized, so the display may appear in the Harmor GUI.
Global Controls
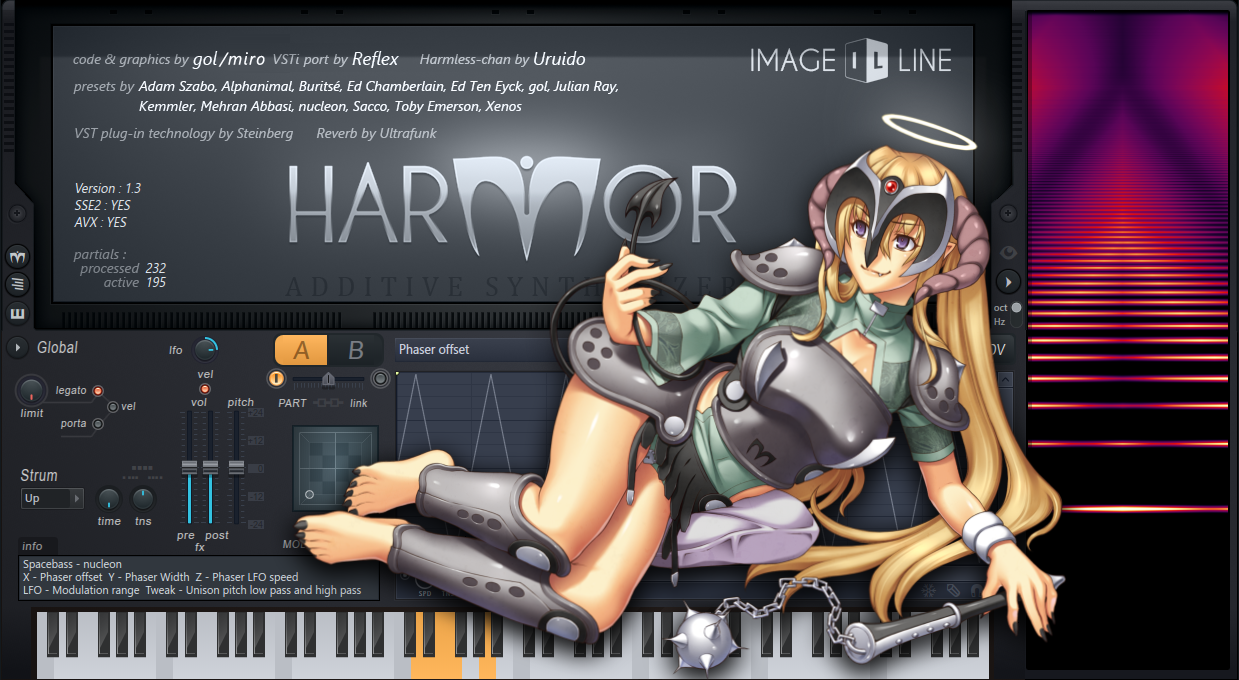
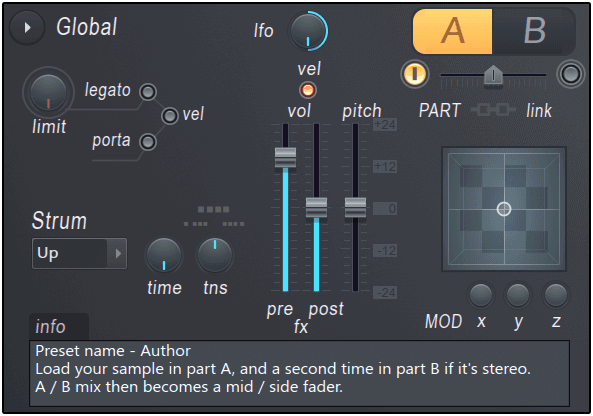
These parameters control performance-related effects such as portamento, strumming, and modulation. The A / B (part) switch is used to access two separate and identical synthetic banks.
- Options – Options menu (next to the global label).
- Copy preset – Copy the currently selected preset.You can use it to transfer presets between instances of Harmor.
- copy part – Harmor has two parts, A and B.Each is the same independent synthetic section.Copy part A or B with this option.
- Paste preset / part – Paste a preset or part. You can also paste between instances of Harmor.
- Lock part – Lock the currently selected part.
- Chorus – Select a chorus preset.These can also be accessed from the FX panel.
- Reverb – Select a reverb preset.These can also be accessed from the FX panel.
- About Harmor – Version number, credits, etc.
- Ifo – Scales all active LFO envelopes.The value can be positive or negative depending on the direction of the lfo knob.
- vel – Link the velocity of the note to the volume.
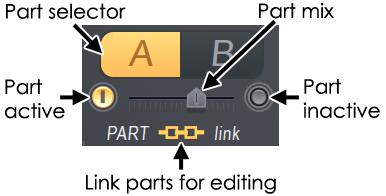
- Part controls – Harmor has two parts, A and B.Each is the same independent synthetic section.
- A / B (switch) – Select Edit Part A or Part B.To use the part in stereoENV> Panning> EnvelopeUse the controls to pan parts A and B in the stereo field.
- Part mix – Controls the balance between parts A and B.This cannot be automated.Rather, use the volume envelopes of parts A and B to create the mix changes.
- Activate switches – Select the switches on both ends of the mix slider to activate or deactivate the part.
- Link parts – Link the part for editing.Therefore, changes made in one part control apply to the same control in the other.You can activate and deactivate the patch while programming to make independent changes related to the controls for each part.NOTE: If the controls are linked, one is automated by an external controller and the other is unresponsive, then each part control must be linked individually to the same external controller knob or slider.Internal automation maintains these linked relationships.
- Limit – The pitch range in which the legato effect occurs.If the limit is exceeded, normal polyphony will be applied.
- Legato (switch) – Legato is a monophonic mode that slides the pitch between overlapping notes.NOTE: This control is "Part A / B LEGATO"of"team","Portamento / Legato time (switches))”, “legato curve (switches)It interacts with.
- porta (switch) – Portamento is a polyphonic mode that slides between overlapping notes.NOTE: This control is "Part A / B LEGATO"of"team","Portamento / Legato time (switches)","limitIt works with the knob.
- vel (switch) – Link note-on velocity to portamento or legato attack time and note-off velocity to legato release time.
- stream – Delays the start of the chord sound.Play chords and set the time knob to a higher time value to create a "strum" effect, such as playing a guitar.Set the direction of the strum as follows:
- Up – The lowest note of the chord is played first and the highest note is played last.
- Down – The highest note of the chord is played first and the lowest note last.
- Alt – The direction alternates up and down with alternating chords.
- Random – The direction of the strum is randomized.
- team – The time it took to strum the chord.
- tns (tension) – Acceleration / deceleration of chords.Left = Acceleration of strum.Right = Strum deceleration.
- MOD X, Y, Z – The XYZ value is "Articulation part">"Modulation X / Y or Z mappingYou can freely assign it to Harmor's modulation target via the envelope. Simply edit the X, Y, or Z modulation mapping envelope from its default (flat) state and it will be selected.Editor targetCan be controlled.NOTE: X (left and right) and Y (up and down) can be controlled by left-clicking and dragging the X / Y / Z area. Z can be controlled with the mouse wheel or click the middle mouse button and drag vertically. NOTE: X and Y also support per-note parameters for the FL Studio Piano Roll.
- pre fx – Pre FX (effects section) volume.
- post fx – Post FX (effects section) volume.
- Pitch – Playback pitch. NOTE: In Image synthesis/resynthesis mode y You can set the playback speed to zero, right-click in the image window, right-click and scrub horizontally (time) and vertically (pitch).


![[Free] Electric piano sample 10 Keys released on Nouveau Baroque 30 2019 08 15 15x32 48](https://chilloutwithbeats.com/wp-content/uploads/2019/08/2019-08-15_15h32_48.png)
Comment