I'm yosi, the caretaker of Chillout with Beats.
It's a hassle to make each automation even though the movement is the same when layering synths.
Automation can be assigned to multiple parameters.
And at that time, the range of change can be adjusted, so it can be used quite a lot.
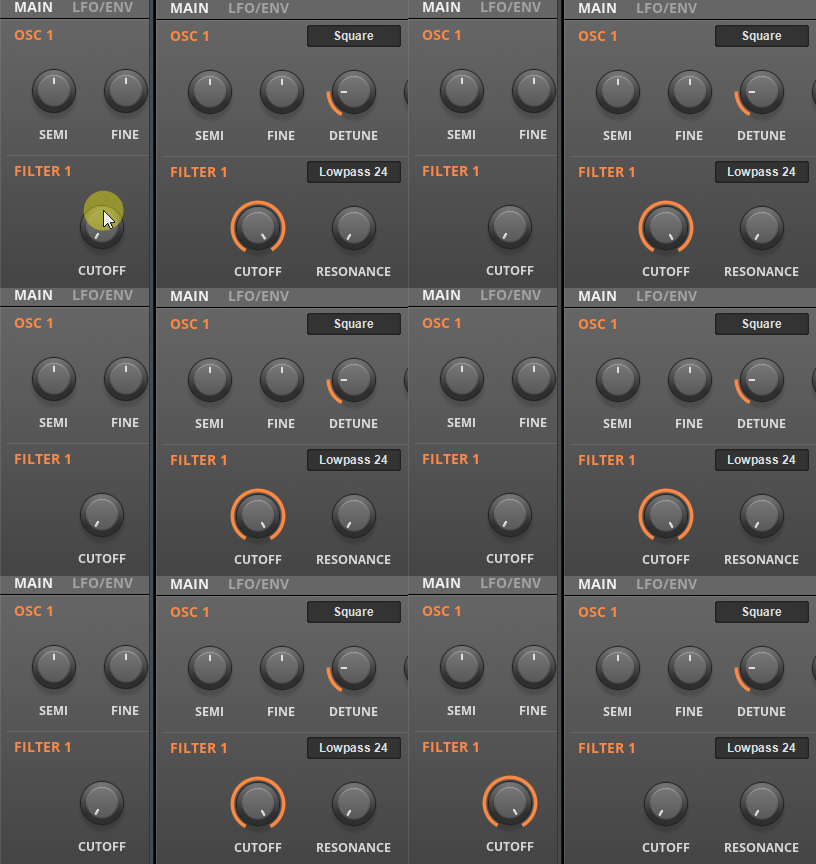
Please take a look at this GIF video.
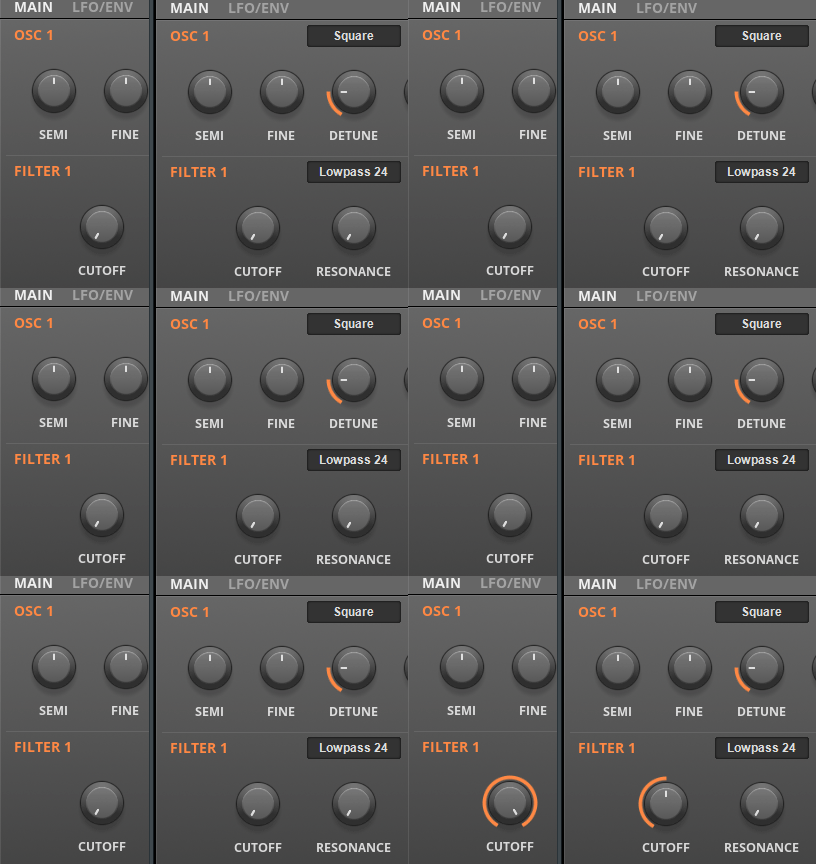
One automation drives the parameters of two synths.
(Resonance is reversed and moved)
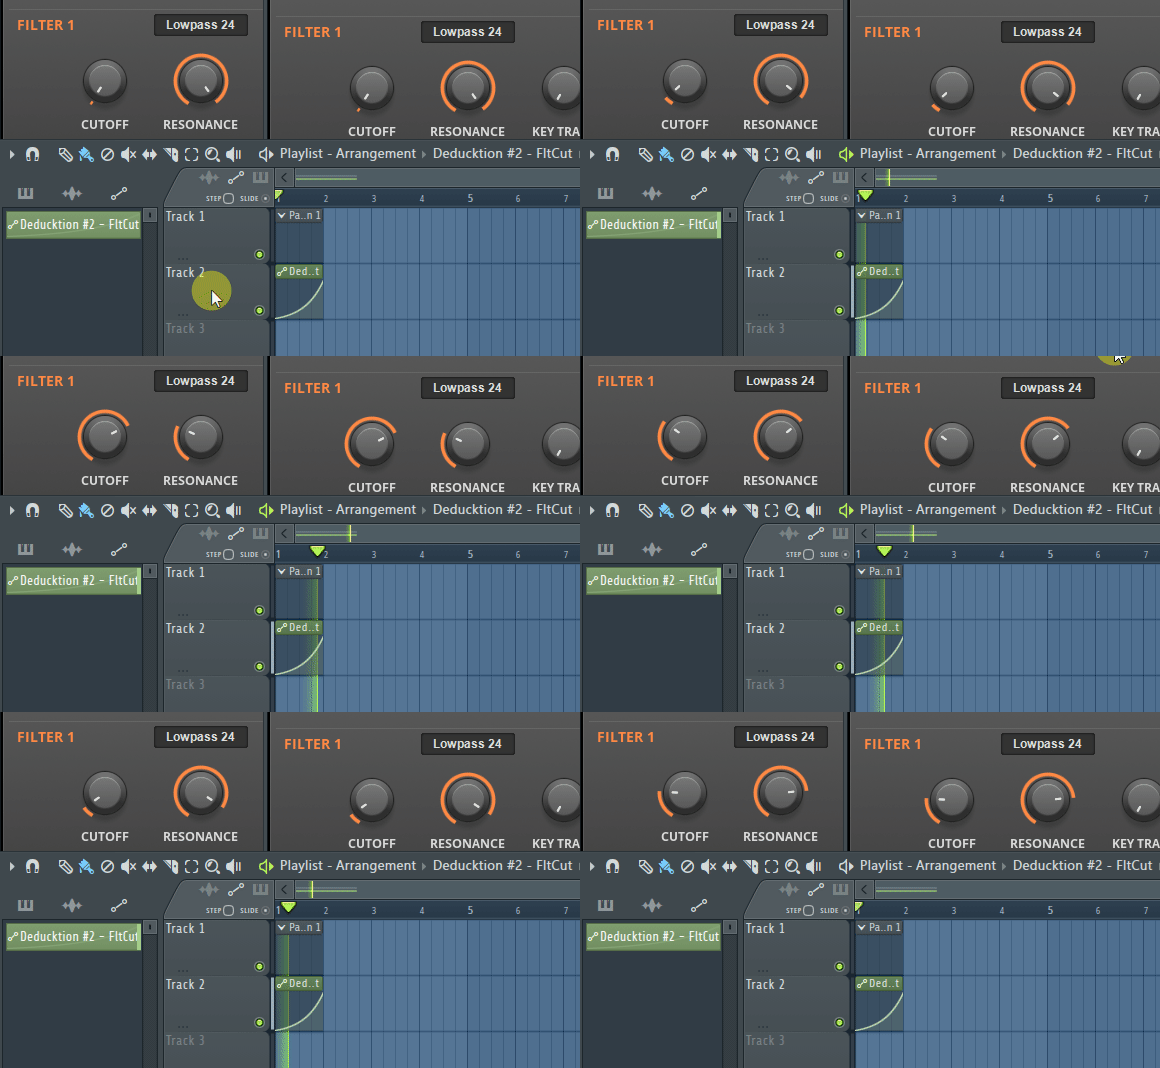
Then I will explain how to do it immediately.
Assign to multiple synths with one automation
First, assign one automation to multiple synths.
Load the appropriate synth.
Free hereDeducktionIs used.
First, create an automation clip.
Click "Browse parameters" from ▼ on the upper left.
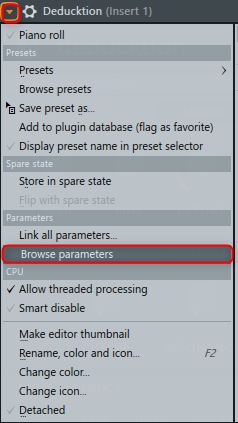
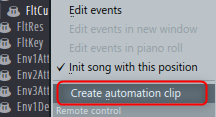
The parameters will be displayed in the browser, so right-click on the parameter for which you want to create an automation clip.
Click "Create automation clip".
At this time, if you move the parameter on the GUI, it will be selected automatically.
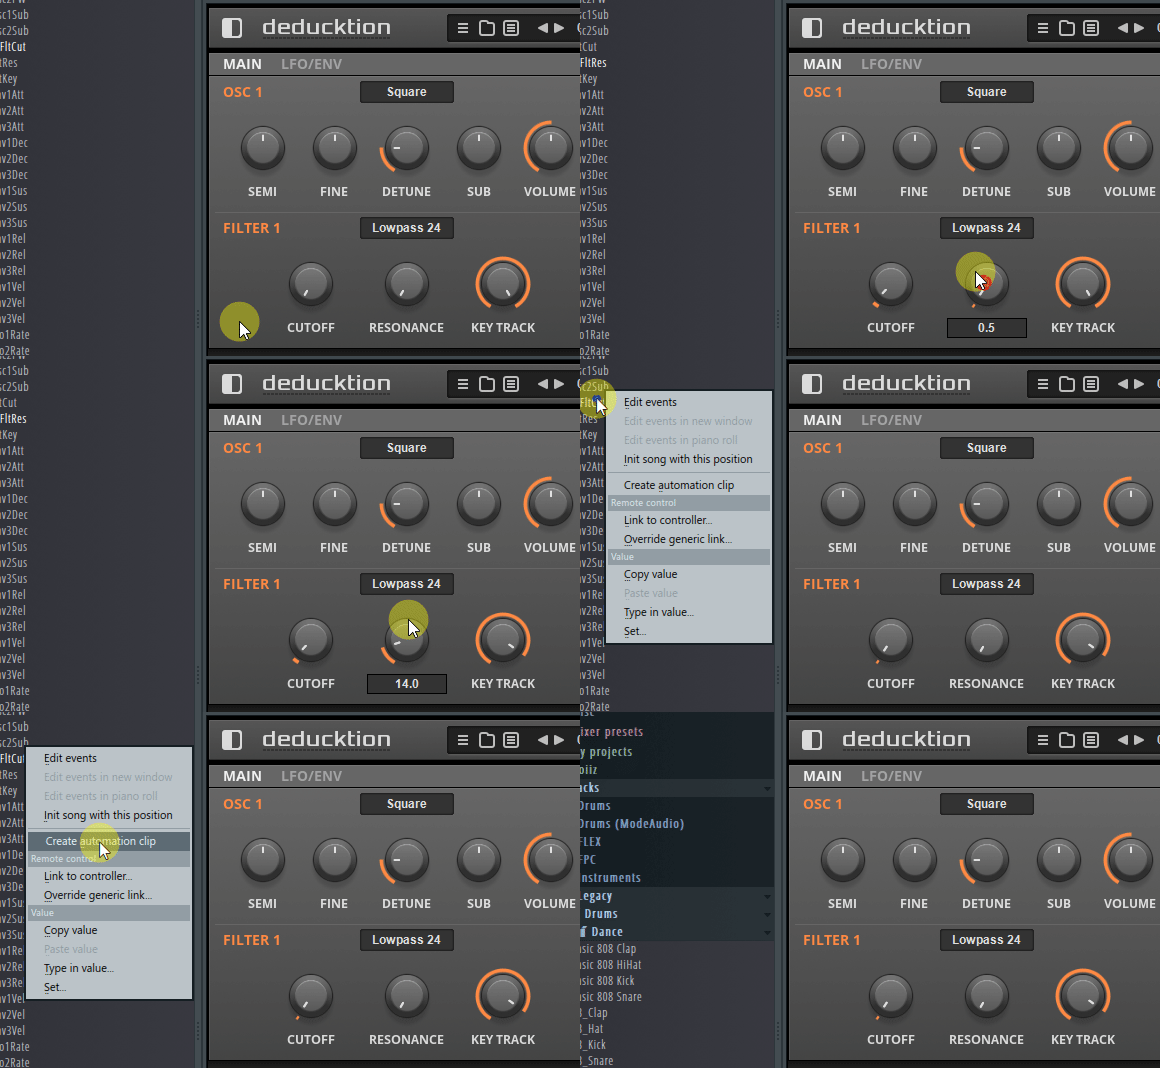
Next is the secondDeducktionIs read.
Click "Browse parameters" from ▼ on the upper left as before.

The parameters will be displayed in the browser, so right-click on the parameter for which you want to create an automation clip.
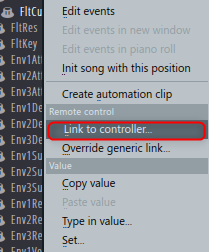
Here, change from the previous one and click "Link to controller".
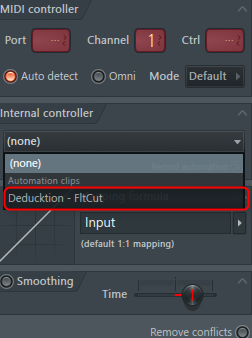
Here, the parameter name set in the first synth from "internal controller" is displayed, so select it.
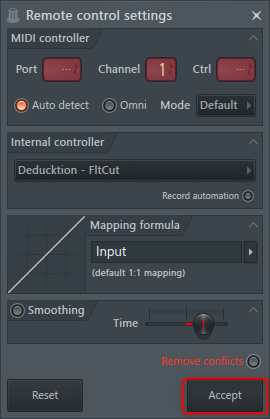
Click "Accept" to complete the setting.
Adjust automation
For example, you may have set the same automation on two synths, but one wants a little less change.
The other common case is to make the Filter Cutoff and Resonance work in exactly the opposite way.
I will explain.
Change the range of change in automation
Here we will halve the change in automation.
It looks like the following.
Click "Browse parameters" from the ▼ on the upper left as you did when setting.

The parameters will be displayed in the browser, so right-click on the parameter for which you want to create an automation clip.
Click "Link to controller" as you did when you set the two.

Click ▼ of "Mapping formula".
Click First half.
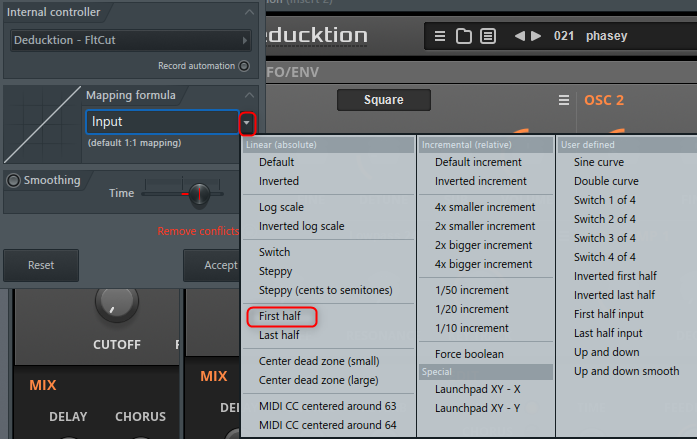
This will halve the range of change on one side.
Select "Inverted" to invert.
Summary
Knowing this will save you a lot of time.
There is also a way to do it with Patcher, so I will write it at another time.
![[61% OFF] Audio Damage plug-in Kombinat Tri is 61% OFF (until 5/1) 23 2020 04 16 22x35 43](https://chilloutwithbeats.com/wp-content/uploads/2020/04/2020-04-16_22h35_43.png)

Comment
Always I am allowed to reference.
I think it is very easy to understand if you make it a video rather than a GIF.
It's already the easiest blog to understand, but for reference only.
hyron
Thank you for your advice.
Certainly, I also realized that videos are better than GIFs from the middle, and I try to give them as much as possible.
(At the beginning, I thought that GIF was easier, but it's hard to use because it can't be paused or rewound.)
Thank you, I'm really happy.
We will continue to update it!