Make a multi-band saturator with FL Studio Patcher
I'm yosi, the caretaker of Chillout with Beats.
In yesterday's article, I thought that a multi-band saturator is good, so I will explain how to make it with Patcher.
There was already a preset called "3 band stereo seperation", and I thought it would be easy if I modified it, but the movement was strange, so I remade it myself.

It's much better than I had imagined.
Even if you want to apply Saturation to the high notes a little, it will be applied to the whole, so this usage is good.
Free to use for SaturatorSoftube Saturation Knob.
And if it ’s free, Melda ’sM SaturatorIs also recommended.
Let's actually make it.
Make a multi-band saturator with Patcher
Divide the band into three
With this method, anything can be processed in multiple bands.
Use 3 Maximus and output Solo in each band.
You can freely adjust the bandwidth by assigning parameters to adjust the bandwidth for three knobs.
It is like this.
Load Patcher into Mixer.
Since it is used as a knob, read "3 band stereo seperation" from the preset.

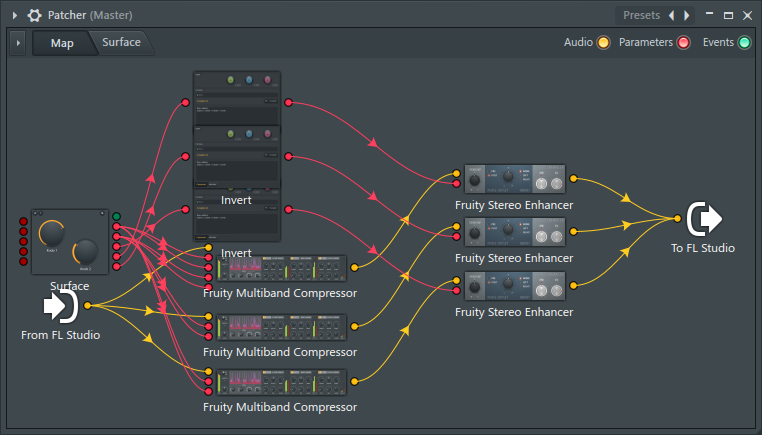
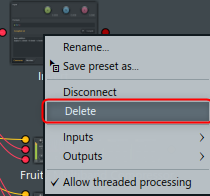
Since it is unnecessary except Surface, delete it.
You can delete it by right-clicking and selecting "Delete".
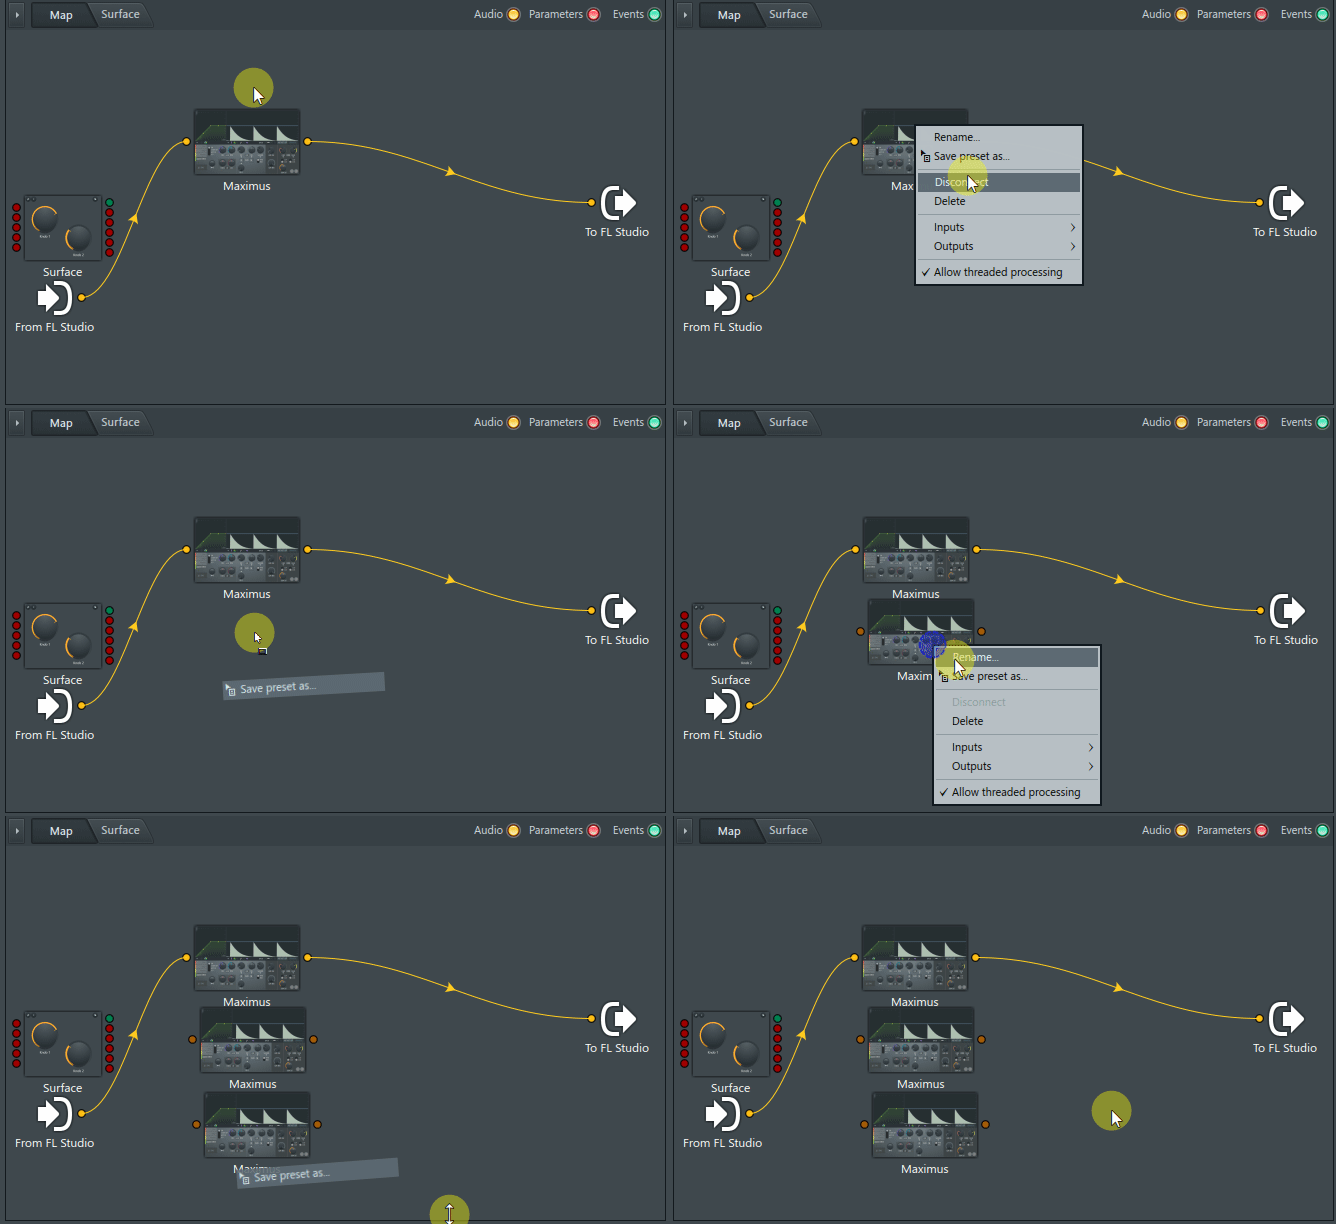
Load one Maximus.
The other two can be easily duplicated by right-clicking and dragging "Save preset as ...".
Addition of Saturator
Then add your favorite Saturator.
(Here, from SoftubeSaturation KnobUse)
After adding one, make three in the same way as above.
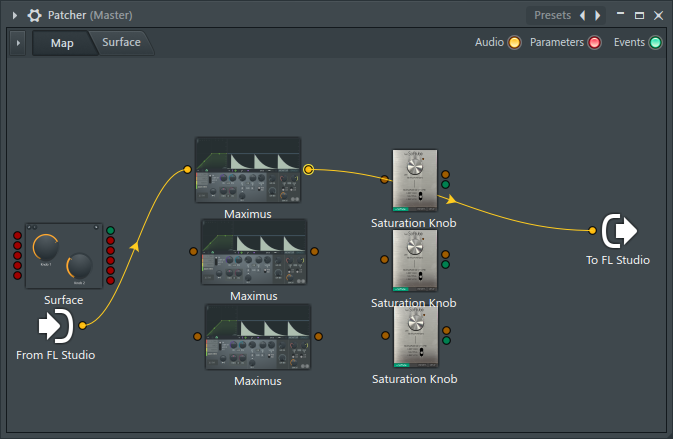
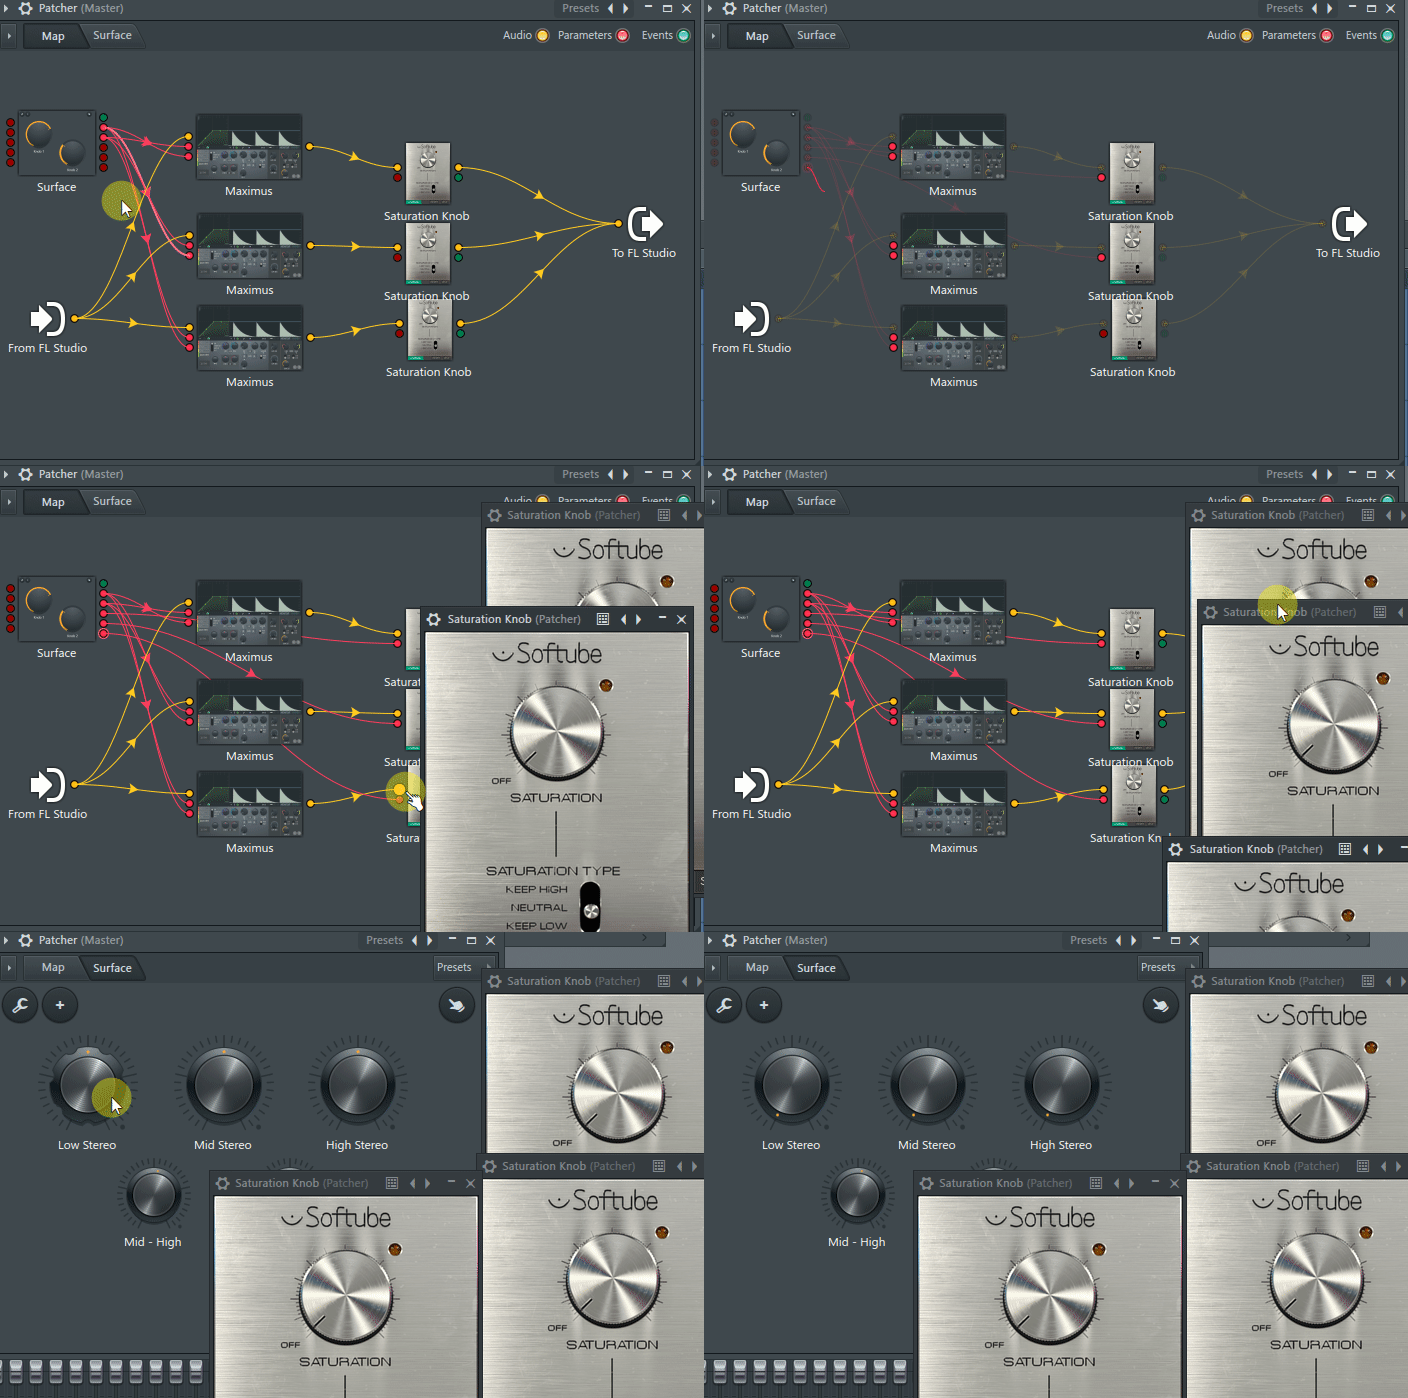
Connect the wiring as follows.
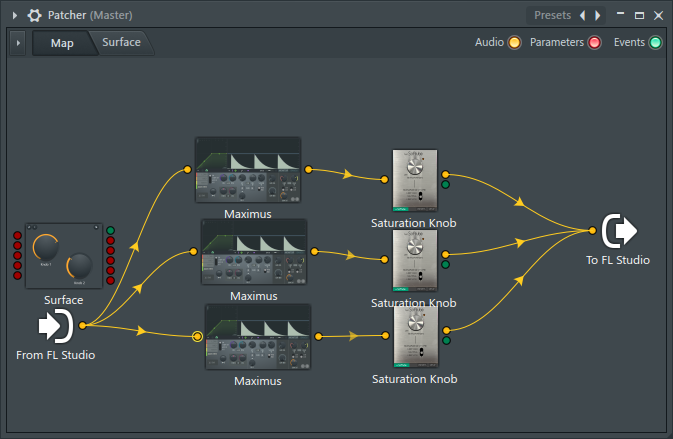
I also prepared a Gif video for the time being.
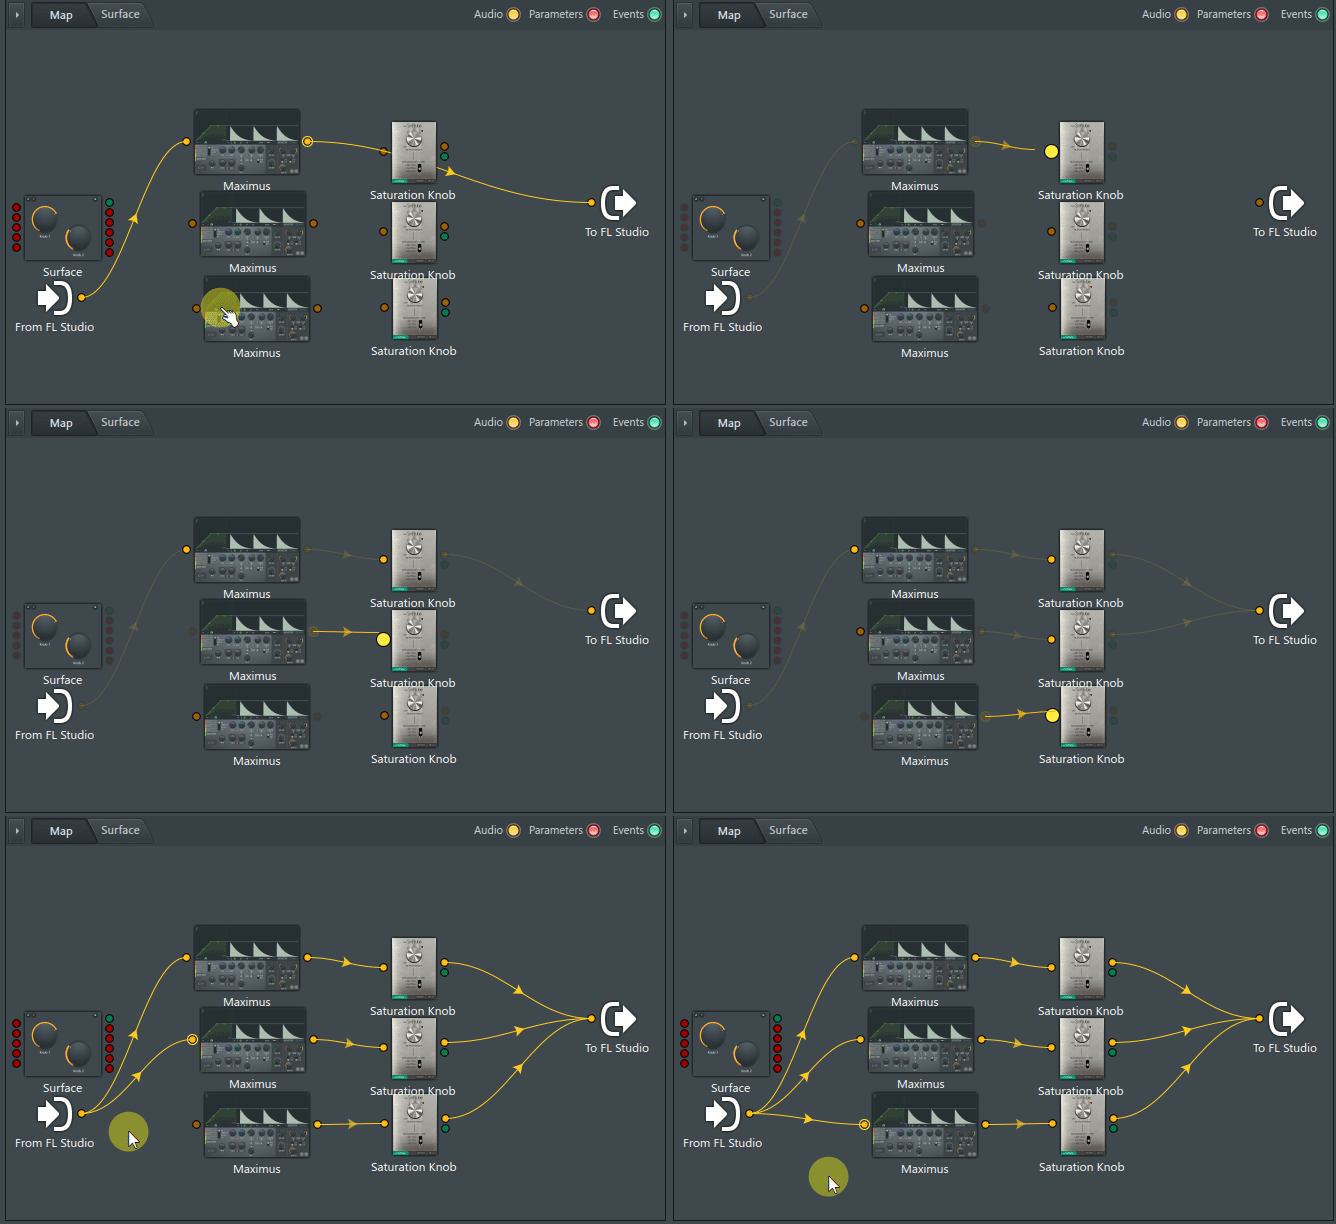
Set the bandwidth of Maximus.That said, it's easy because you only have to press the Solo button for each band.
I think that Gif videos are easier to understand than many images, so I prepared Gif videos.
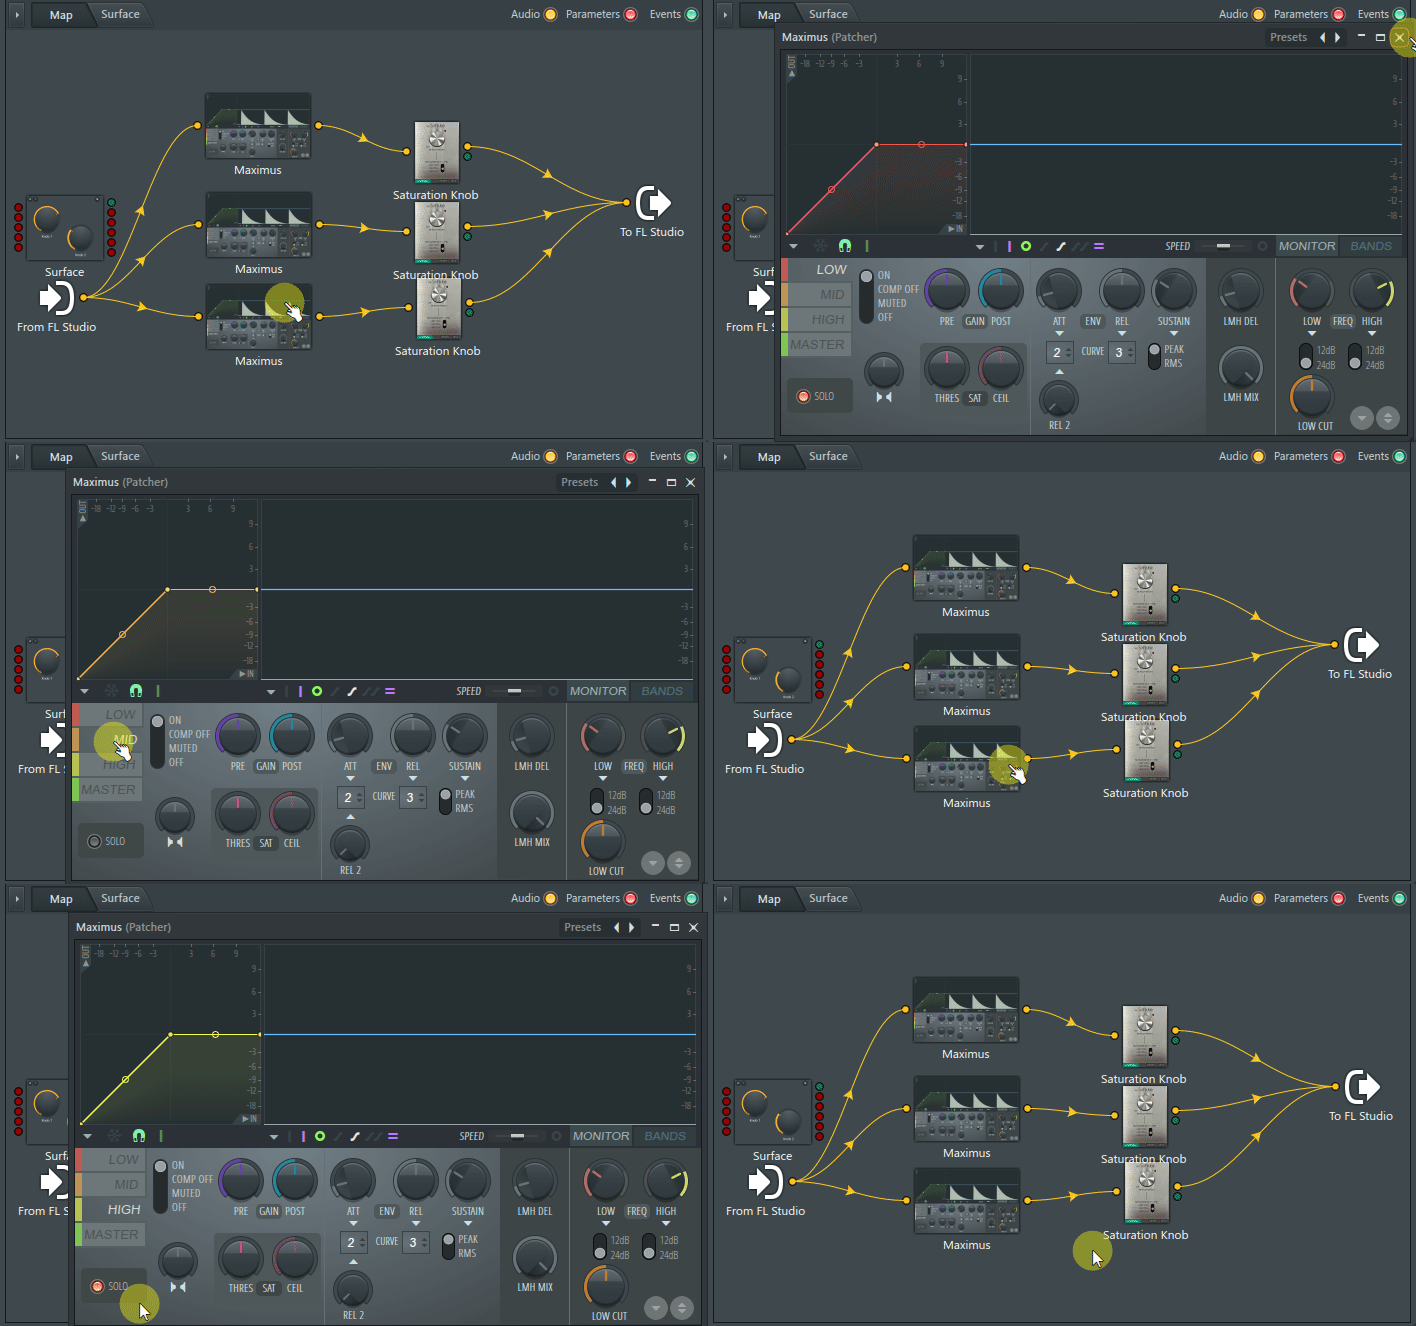
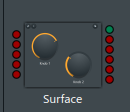
Surface (knob) connection
Next, connect the Surface (knob).This is also easy.
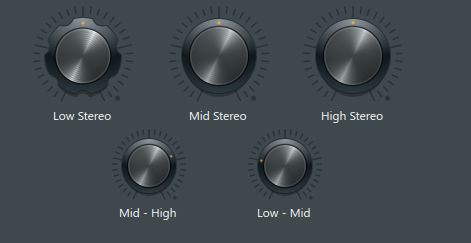
The order is as follows from the top.
2.Low-Mid
3.High-Stereo
4.Mid-Stereo
5.Low-Stereo
Assign Maximus parameters to "1. Mid – High" and "2. Low – Mid".
We also prepared a GIF video.
Open all Maximus and move the knobs to make sure they are as assigned.
As with FL Studio as a whole, if you want to display multiple plug-ins,AltHold down and click.
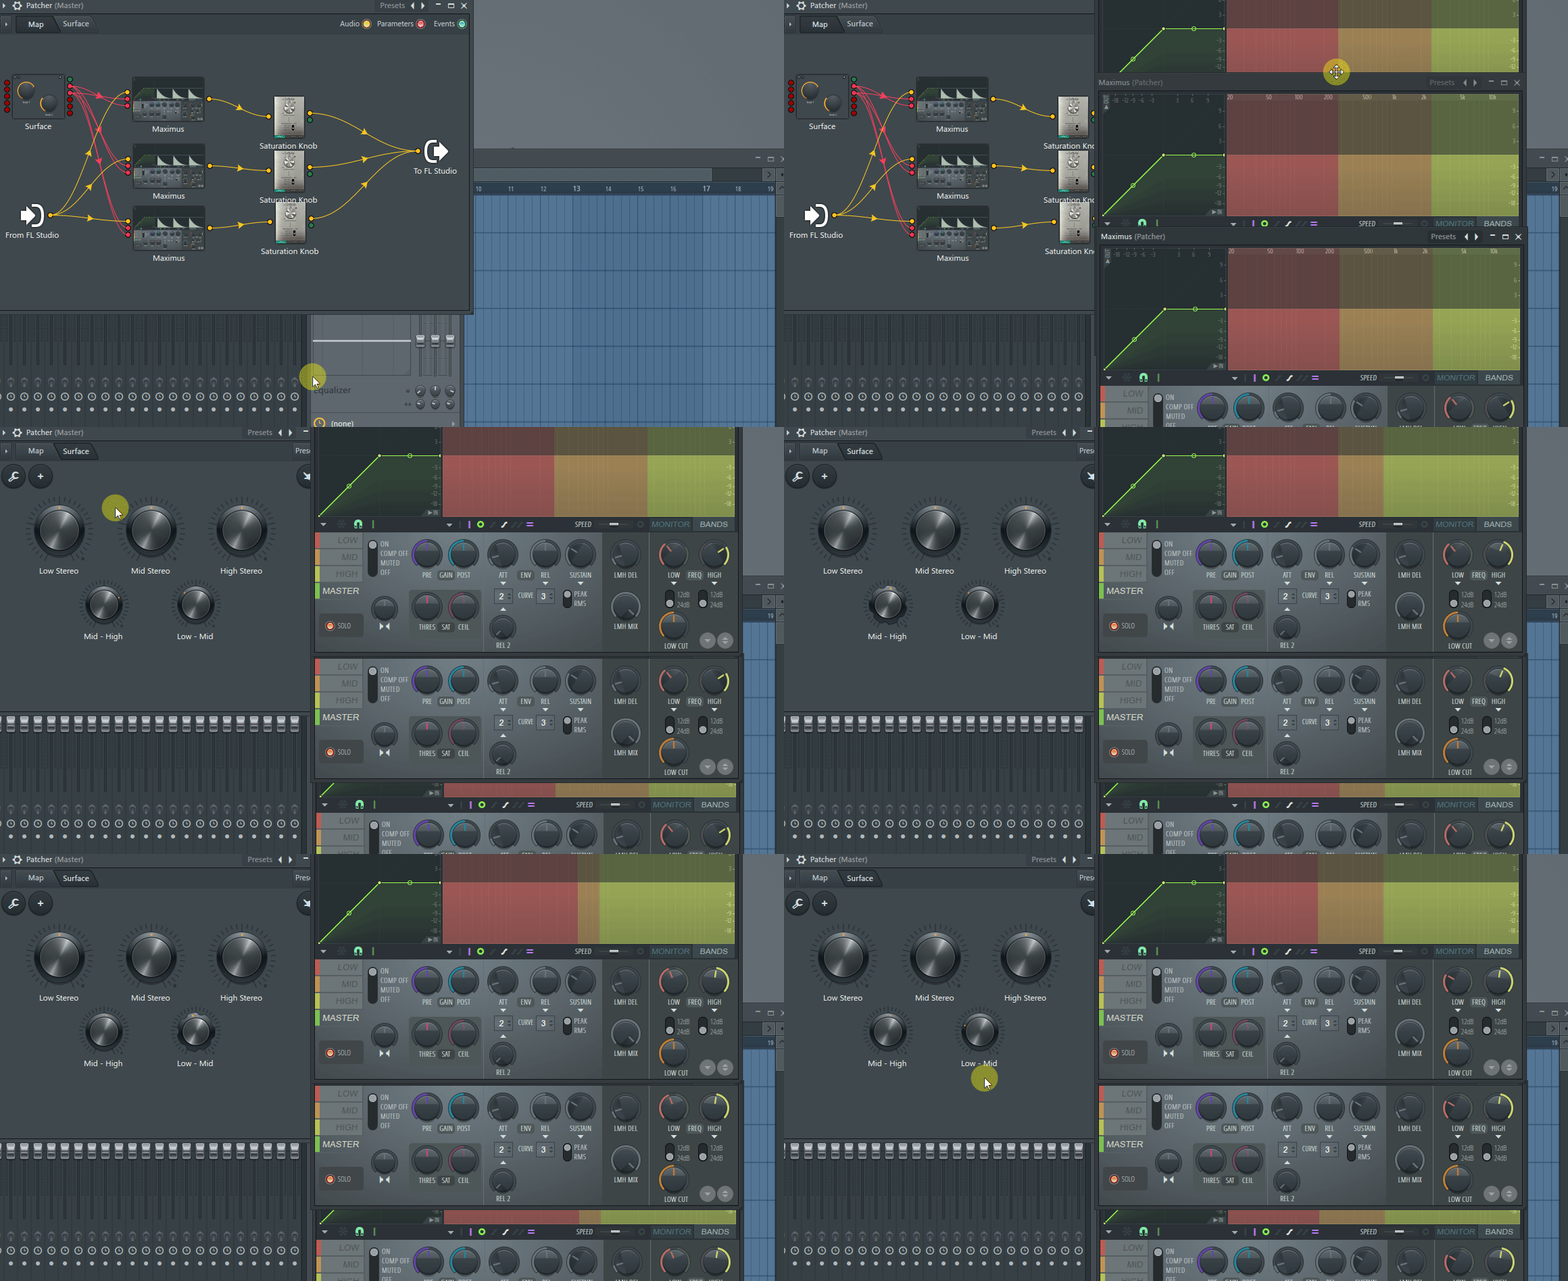
Next, connect the parameters of Saturator.
Right-click Saturator and click Input-> Parameters-> 1.Satulation.
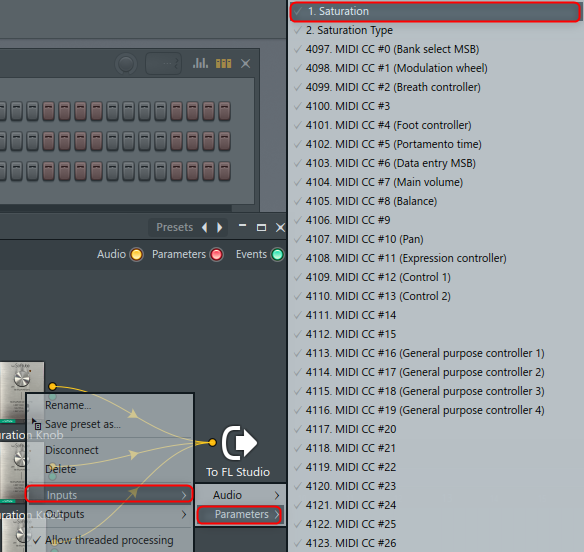
Repeat this with the remaining two.
There will be a red circle on the left side of the Saturator.
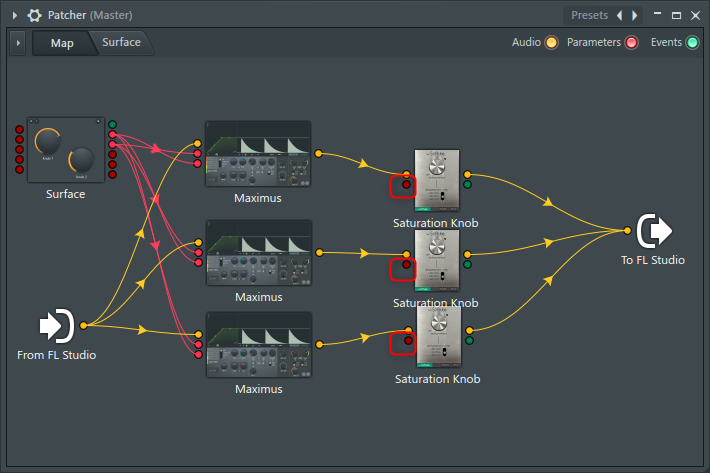
After that, connect in order from the top.
Move the knob and check the operation.
That's it, but fix the knob placement and label.
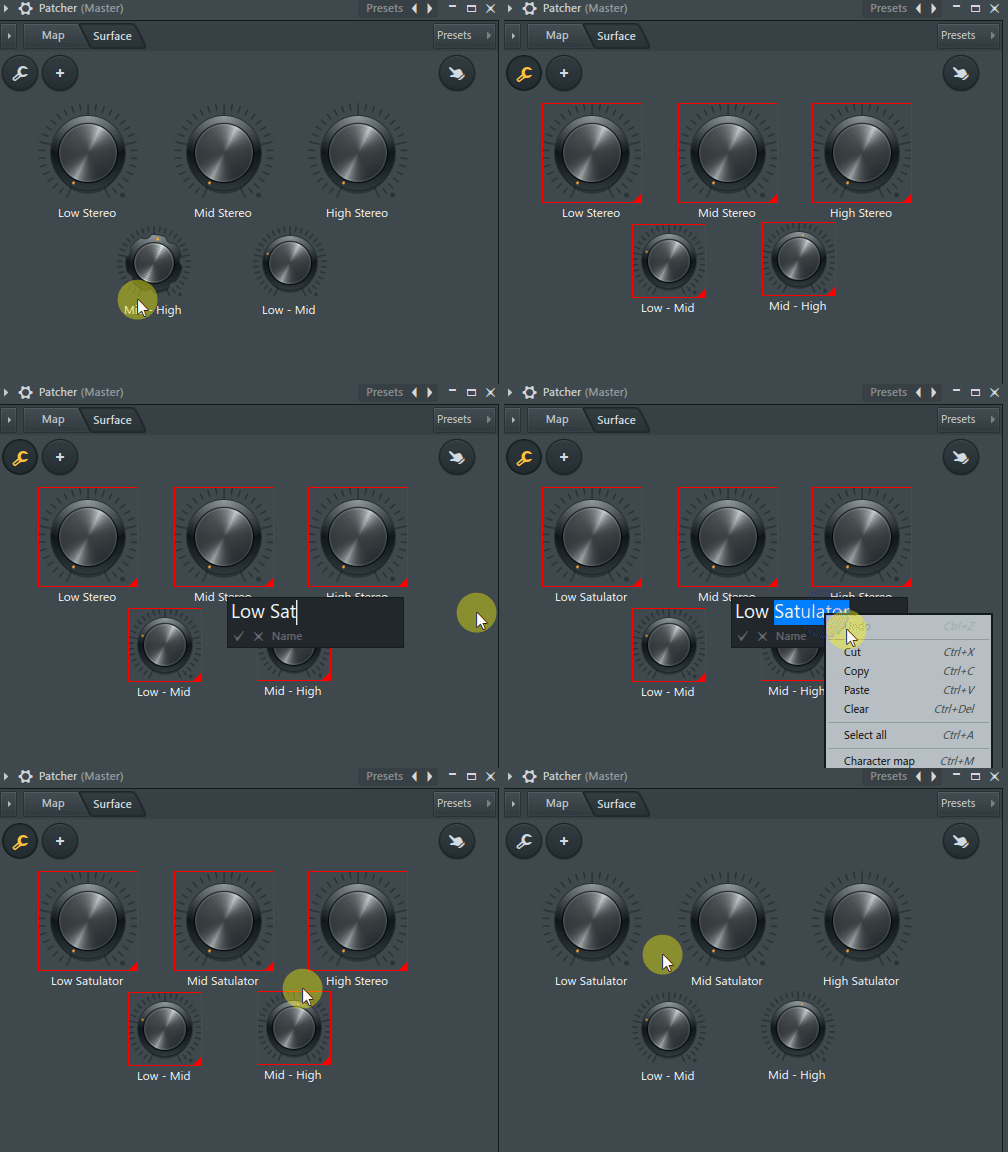
that's all.
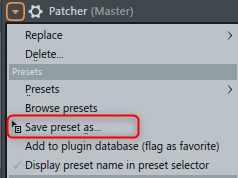
I think it can be used for something, so save it.
You can save it with "Save as" from the icon on the upper left.
Summary of making a multi-band saturator with FL Studio Patcher
Please try to make it using your favorite Saturator.
It seems that various things can be done depending on the idea.
I've come up with a lot of things, so I'll write a little article in this series.


Comment