How to use Polyverse GateKeeper ③ (Parameter XNUMX)
Click here for articles up to the last time
This time, I will explain about the parameters.
The main manual is a Japanese translation, but some videos have been added to make it easier to understand.
GateKeeper parameter explanation
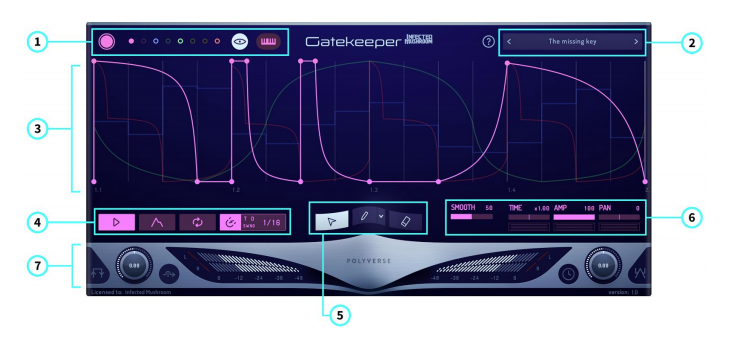
The name of each part.
① Envelope selector and MIDI control
② Preset browser
③ Envelope grid
④ Envelope trigger and grid control
⑤ Envelope node creation tool
⑥ Envelope modulation control
⑦ I / O control bar
I will explain the parameters in each part.
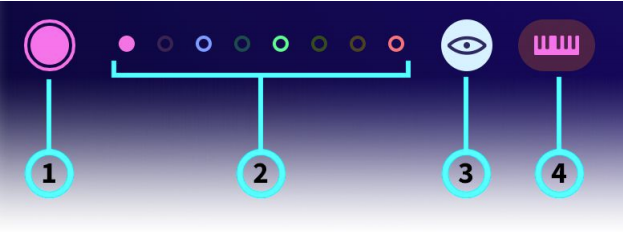
① Envelope selector and MIDI control
(8) Enable / disable the eight envelopes.
(8) Select the one you want to edit from the eight envelopes.You can use the combination envelope to create panning effects, polyrhythms, layer parts, or trigger them individually.
③ Display all valid envelopes.
④ This will only respond to notes that have been Midi Learned by the envelope.
Click the button to enter “Learn Mode” (the button will be highlighted).
Play the desired MIDI note.You can play as many as you like in any order.When you are finished, click the button again to exit “Learn Mode”.
Envelopes are now triggered only by the selected note.
If the note is not “Learn Mode”, the envelope will be triggered no matter which note is pressed.
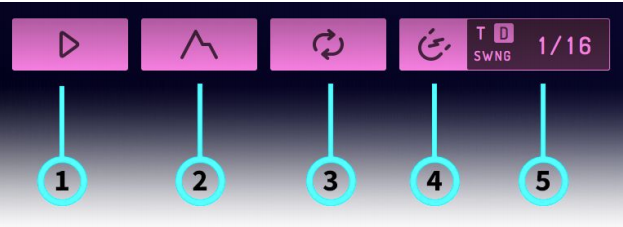
④ Envelope trigger and grid control
① AutoPlay – When turned on, the envelope will be triggered and repeated continuously.When on, the envelope is triggered and plays continuously and repeatedly.
The envelope ignores MIDI input.
② Envelope Mode – When enabled, moving a node will automatically move all subsequent nodes (like an envelope).When disabled, each node can only move within the space between surrounding nodes.The maximum travel time between nodes is 10 seconds.
③ Sustain Loop – Sets the inner loop in the envelope defined by the loop start point and loop end point.The loop start and loop end points exist only on the node.To define the start and end points of the loop, right-click the node and select Start Loop or End Loop.You can also easily drag the handle of the loop marker to any node.The start and end points of the loop snap to the same amplitude as you move to avoid clicking.
When you use a MIDI note to trigger an envelope, the envelope iterates through the segments.
When it reaches the sustain loop, it loops until the note is released.The gatekeeper plays the rest of the envelope following the end of the loop.When the sustain loop is turned off, it ignores the "note off" signal and plays the one-shot version of the envelope from start to finish.
④ Snap – When enabled, snaps to the Gatekeeper grid.You can easily switch between.You can snap on / off with the “S” on the keyboard.
Grid – The grid can be set to note values from one bar to 1th note.There are notes such as.It can also be displayed in "TIME" in seconds.Click and drag up or down to use the note values to adjust the grid.You can also double-click to enter custom grid values.
⑤ The grid can be changed by enabling (D) dots, (T) triplets, or swings.If the grid is set to the TIME value and autoplay is active, the envelope will not sync to the host BPM.
⑤ Envelope node creation tool
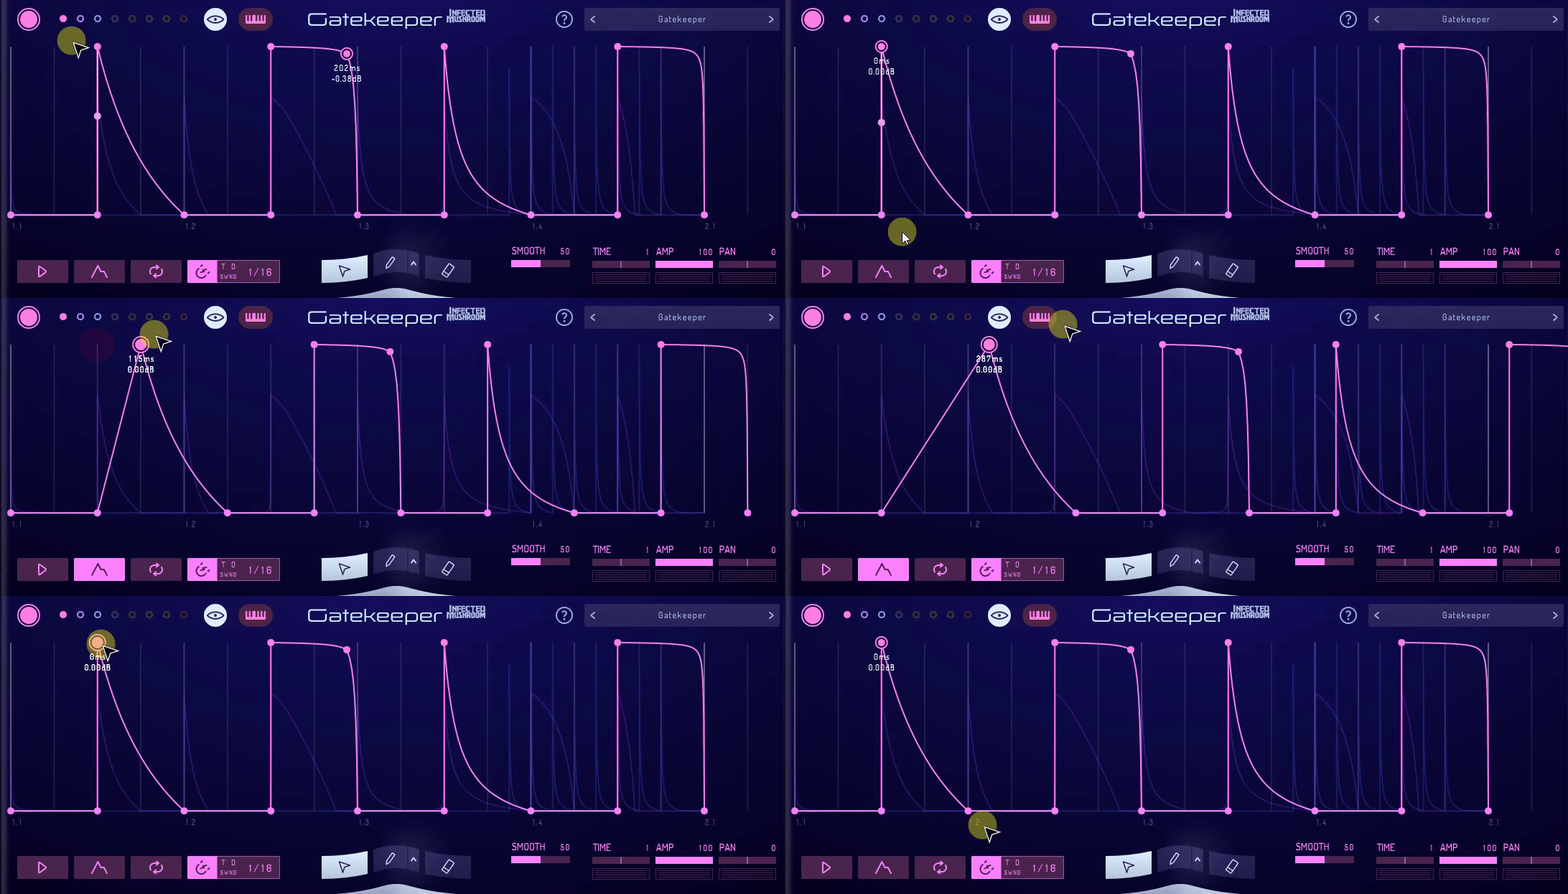
Editing Tools – Gatekeeper's main tool.You can create, select, and move nodes in the envelope grid.
Create a new node
Click anywhere along the line Double-click on the background of the envelope
Delete a node Double-click a node, select the node, and press or delete the backspace key.Move Node Click and drag the node.
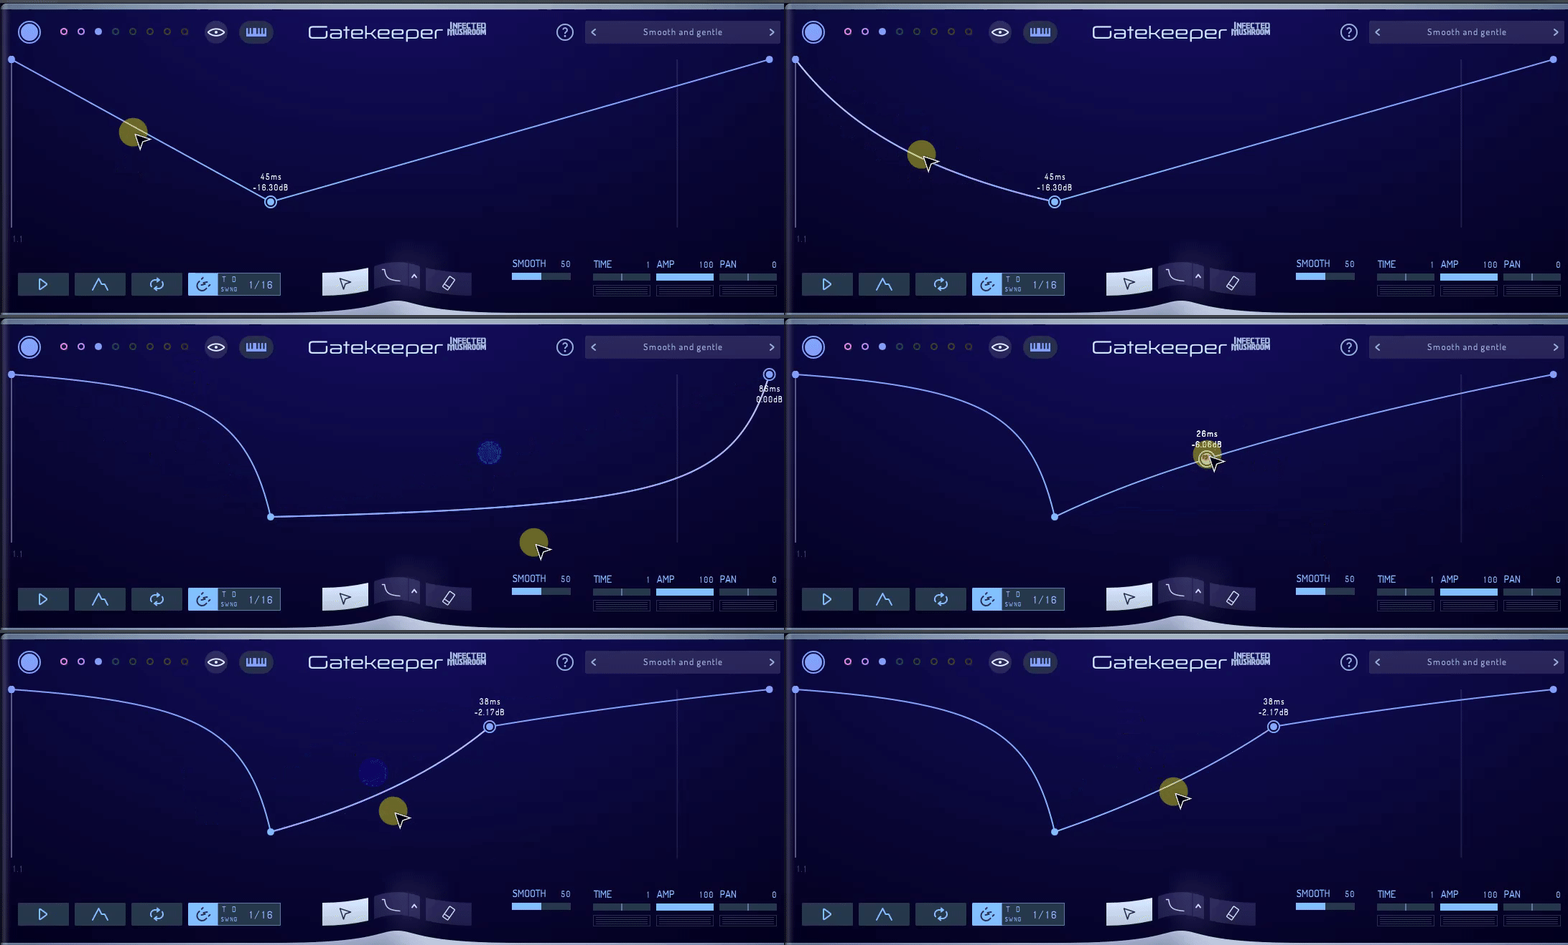
Curve change
Right-click or Control-drag along the line.
Zoom in / zoom out
Use the mouse wheel.
Right-click on the background of the envelope and drag it up or down.
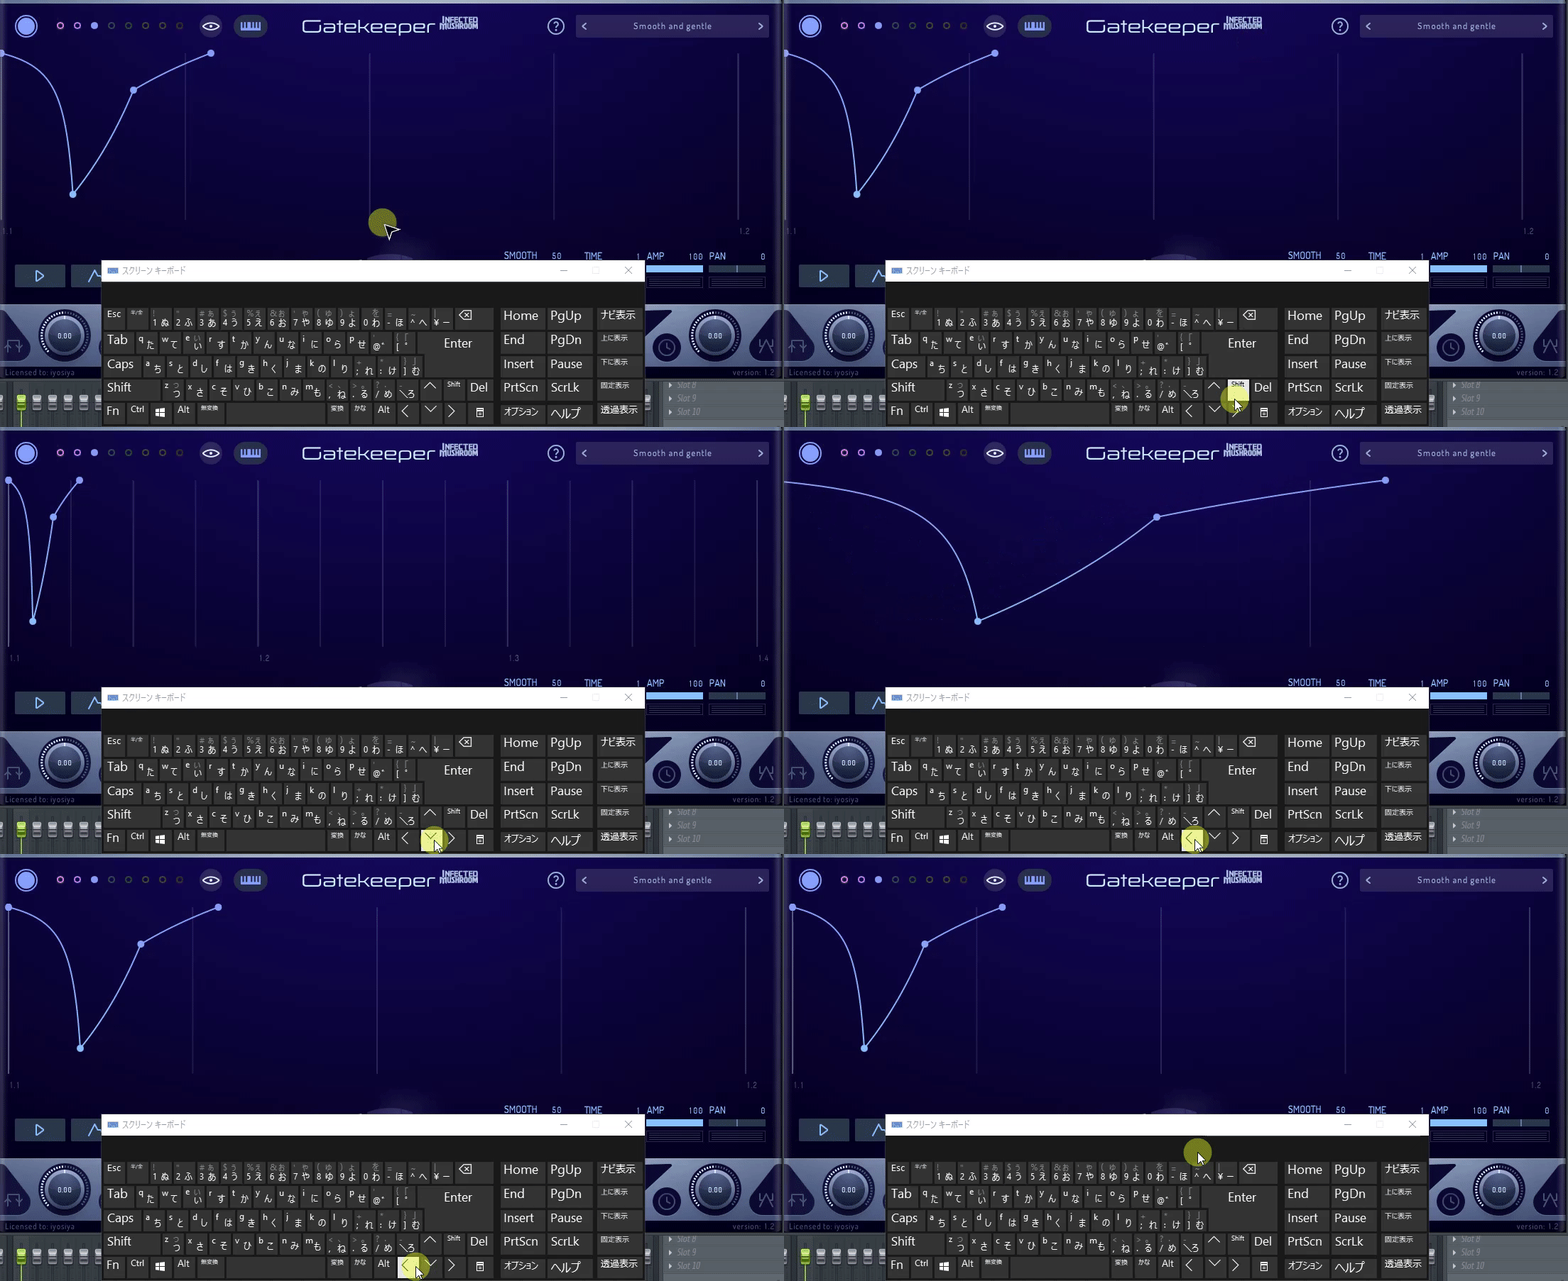
Use the shortcut. Use the "[" and "] or" ↑ "and" ↓ "shortcuts.
Left / right scroll
Right-click on the envelope background and drag left or right.
If you have a trackpad or compatible mouse, scroll left or right.
Use the shortcut.And ”,“ and ”. Use the shortcuts“ or ”→” and “←”.
Node selection
Click on the envelope background and drag to select it.
Shift Click the + node.
Select a node to copy, paste, delete, automate, boost, and quantize.
Node scaling
Select multiple nodes (you can also select only the beginning and end of the section you want to scale).
Press the shift key and then drag the node to scale the selection.
Grab the left node to scale to the right and grab the right node to scale to the left.
Grabbing the upper node expands the amplitude range, and grabbing the lower node compresses it.
Copy
Select the node you want to copy.
Right click> Select Copy.
Type "c" on the keyboard.
note: This only works if more than one node is selected.
pasting
Select the node you want to paste, or select two nodes and paste in between.
Right click> select "Past"
Type "v" on the keyboard.
This only works if you have a copied shape.
copy
Select the node you want to duplicate.
Type "d" on the keyboard.
This only works if more than one node is selected.
undo
Right click> select "Undo".
Type "u" on the keyboard.
Redo
Right click> select "Redo"
Type "r" on the keyboard.
Quantize
This will quantize the node to the nearest grid line
Right click> select Quantize.
Type "q" on the keyboard.
Boost x 10
This will create a node that is 10 times louder.You can also use the clip function to soothe.
Right click> select Boost x10.
Select the node and type “b” on the keyboard.
Load envelope
You can load individual envelope patterns from within the presets.
Right-click> Select Load Envelope> Select the preset and envelope slot you want to load.
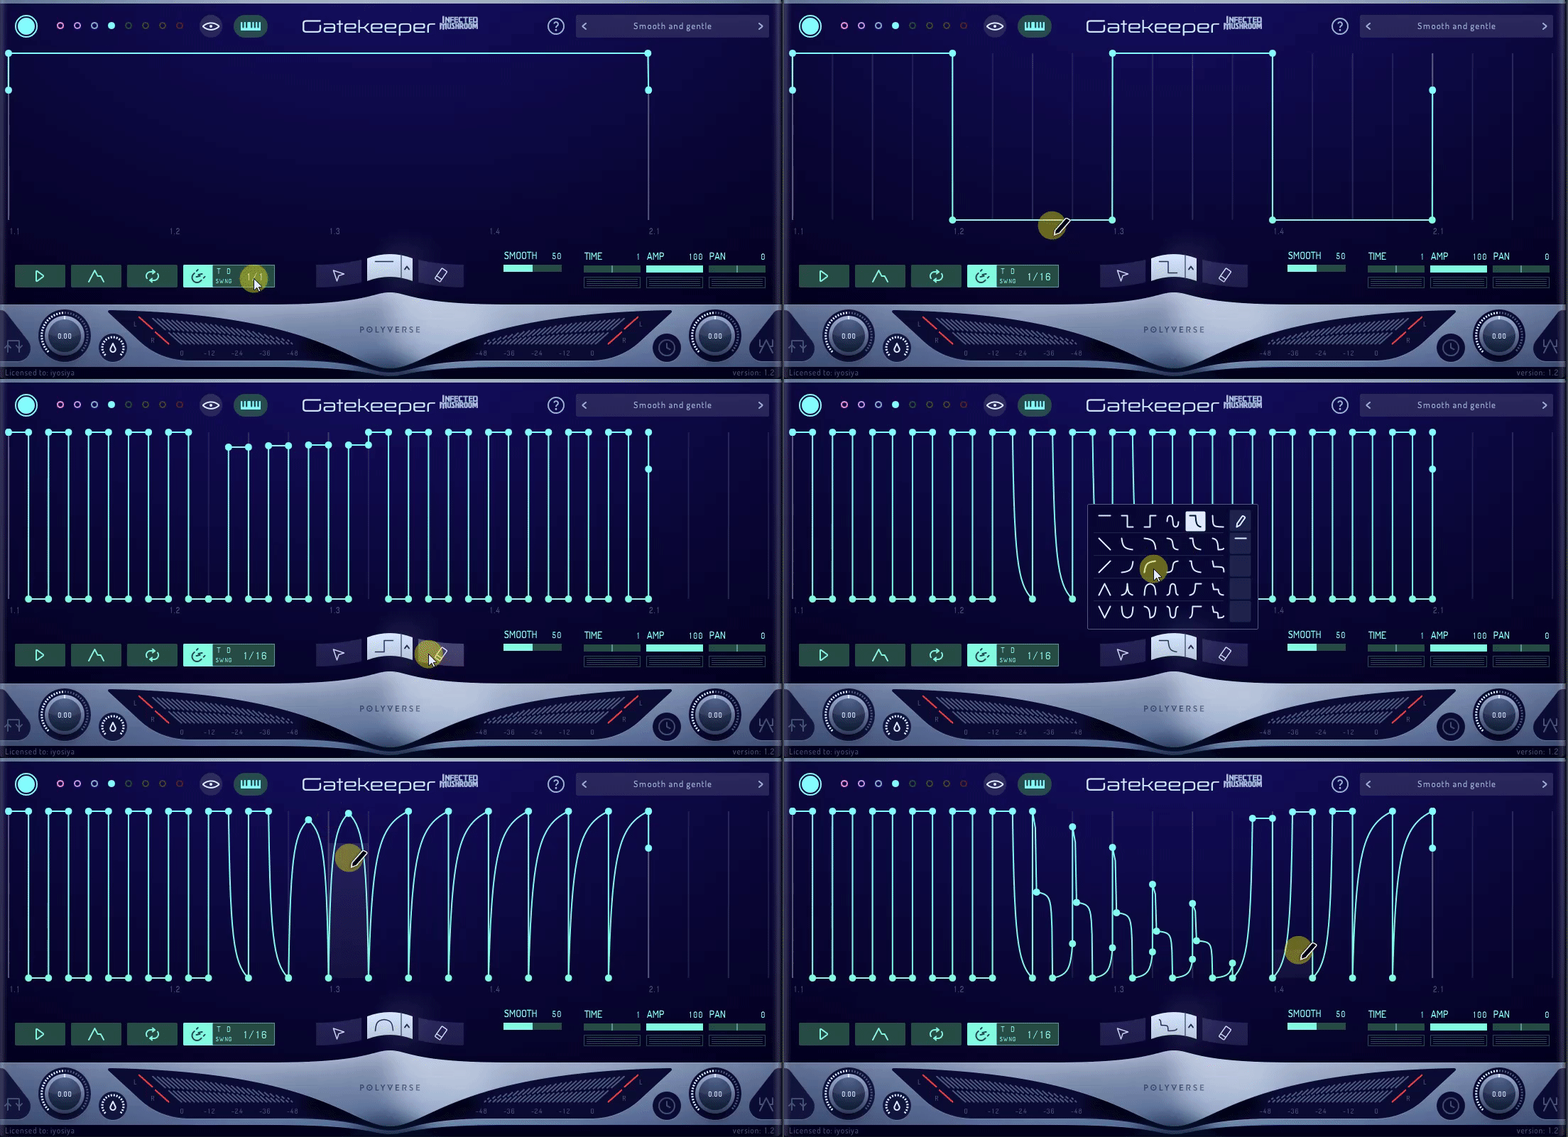
① Fill Tool – With the Fill Tool, you can draw an envelope using multiple shapes prepared in advance.Each shape has multiple nodes.
(30) Paintbrush Shapes-We have prepared XNUMX types of brush shapes that are convenient for quickly creating rhythmic sequencers, LFOs, pseudo sidechain effects (ducking), and more!Click the down arrow to select a brush.
To select a brush, click the down arrow to open the brush menu, or right-click the envelope in brush mode.
If you copy a shape with 8 or less nodes, it will appear as an additional brush in the menu.
③ Eraser Tool – You can easily erase a node by clicking and dragging around the grid.
⑥ Envelope modulation control
SMOOTH – Smooths pops and clicks while preserving envelope punch as much as possible.Apply a filter that curves the peaks of the envelope.If you set the smoothing to 0, the envelope will sample faster.However, if the envelope is faster than the audio:Adjusting the envelope with the smooth slider makes it as fast as the audio comes in, giving you the most punchy envelope possible without clicking.
TIME – Adjusts the speed of the envelope from 0.1x to 10x.
AMP – Sets the amplitude of each envelope.
PAN – Bread.
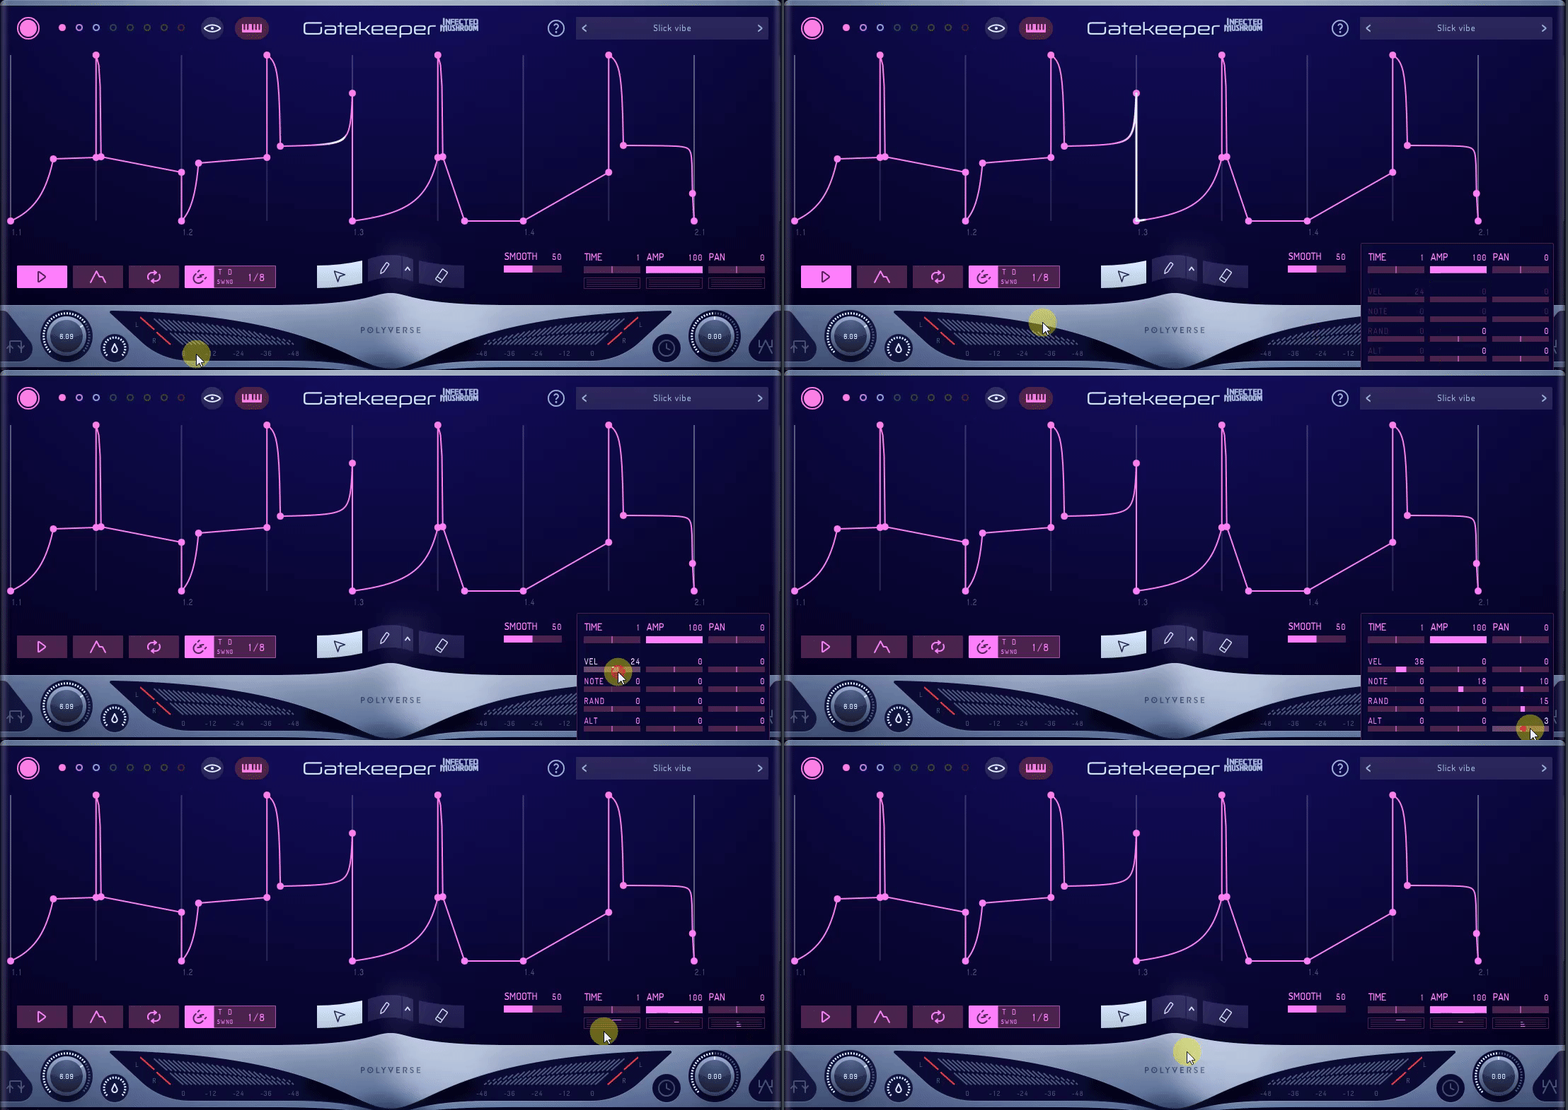
MIDI modulation control
VEL (Velocity) affects parameters based on note intensity. Only available when using MIDI input (not available in AutoPlay mode).
NOTE affects the parameters depending on the keyboard range (not available in AutoPlay mode).
RAND randomly adjusts the parameters each time the note is triggered.
ALT alternates between maximum and minimum values for the affected parameters.
If the plugin is synced to the host (autoplay is on), RAND and ALT will be disabled.
⑦ I / O control bar
① Trigger – Triggers the envelope only once.Click and press and hold to display the "Note on" message.
When you release your hand, a "note off" signal will be sent.Triggers (and MIDI note input) do not work in autoplay mode.
② Input Volume – Amplifies the signal before the signal chain.It can be set in the range from minus infinity to +12 dB.You can set the Input Volume back to zero by double-clicking the knob.
③ Bypass – Smoothly fades seamless transitions.You cannot disable the plugin.If you want to completely bypass the plug-in, use DAW Host Bypass.
④ Input Level Meters – Displays the volume of the audio signal input from the amplifier (postfader).You can reset it by clicking the meter.
⑤ Output Level Meters – Displays the volume of the output audio signal (postfader).Click to reset the meter.
⑥ Delay – Stereo ping-pong delay
WET: Adjusts the amount of delay signal.
TIME: Controls the length of time between any two iterations of the signal defined by the duration value of the note (eg 2d = dotted eighth note).
FB (Feedback): Determines the amount of repetition.
⑦ Output Volume – Useful for amplifying the signal after signal chaining and lowering the volume after clipping / saturation.Range: From minus infinity to +12 dB.Double-click to center to zero.
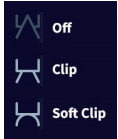
⑧ Clip – Gatekeeper provides a simple clipping and saturation algorithm that helps to trim the envelope while keeping the envelope punched.Especially when used in combination with the Boost function, you can achieve a punchy sound.
Off – The clip is turned off.
Clip-The gatekeeper clips the audio at 0 dB (before the output knob).
Soft Clip-The clip is slightly curved for a soft, rounded sound.
How to use Polyverse GateKeeper ③ (Parameter XNUMX) Summary
However, the shortcut is a built-in that does not seem to be a plug-in.
It's pretty easy to edit if you remember.
Perhaps Infected Mushroom actually uses it to provide feedback on development.






![[Free] Room Piano v3 released on SampleScience 29 2020 12 07 23x07 59](https://chilloutwithbeats.com/wp-content/uploads/2020/12/2020-12-07_23h07_59.png)
![[Free] Serum preset Nu Disco Arps is distributed free of charge with Synthctrl 30 2020 12 08 23x44 37](https://chilloutwithbeats.com/wp-content/uploads/2020/12/2020-12-08_23h44_37.png)
Comment